Formation of a visual-motor image of a letter in the student’s memory. Lesson "sound and object images of the letter u" Objective image of the letter u
Purpose of the lesson: study the letter U, develop reading skills, develop speech skills, improve phonemic awareness, and the basics of elementary graphic skills.
- introduce the preschooler to the letter U and the correct pronunciation of the sound;
- teach how to write the printed letter U in squares;
- to generate interest in learning poems and riddles.
Name what is shown in the pictures below:
Morning Snail Duck Iron
Ask what sound the words begin with - the names of the pictures?
To pronounce [U], you need to make a tube with your lips, open your mouth slightly and “turn on” your voice. Repeat: UUU
Do your teeth, lips or tongue prevent air from coming out of your mouth freely? (No, they don’t interfere.)
Close eyes. What do you hear? (Traffic noise, music, etc.)
We hear different sounds.
Close your eyes again and listen: Aah, Uuu... These are also sounds - the sounds of human speech. Sounds make up the words we use to speak.
AAA is a sound, AIST is a word.
UUU is a sound, DUCK is a word.
Please remember: we hear sounds, we pronounce them. You can use letters to write down speech sounds and words. We see letters, we write them, we read them.
A preschooler will be able to distinguish between the concepts of sound, letter, and word gradually, as a result of constant repetition over a long time.
Find out the sound
Raise your hand if you hear the sound [u] in the words: spider, flower, puddle, sofa, table, chair, pigeons, chicken.
Who is bigger?
- Think of words with the sound [u] at the beginning (street, morning, dinner), in the middle (hands, pear, cabbage), at the end of the word (I walk, carry, below).
- Come up with words in which the [y] sound is second (puddle, bough, bedside table).
- Guess the words that have only three letters, the second and third being uk (beetle, onion, bough, beech).
Assignment: printed letter U for preschoolers
Draw the sticks carefully along the cells with a simple pencil or ballpoint pen.
In cases where the child is asked to write a whole line of a letter, syllable or word, the adult gives a writing sample at the beginning of the line.
If a preschooler has difficulties, then an adult can draw two approximate lines, or put reference points that the child will connect with lines, or write the entire letters, and the child will simply circle them in a different color. Calligraphy should not be required at this stage of training.

Continue the sentence
I'm not bragging when I say:
I will make all my friends younger!
Despondent people come to me -
With wrinkles, with folds,
They are leaving very nice,
Fun and smooth!
So, I'm a reliable friend -
Electric... (iron).
He's floating on the sheet
Like a boat on the wave.
He is a good friend to housewives
Electric... (iron).
Autumn has come,
And the snowstorms will come.
And with a farewell cry
Birds... (fly away).
The long-awaited call was given -
It's over... (lesson).
Who walks with a bag of books
Going to school in the morning? … (Student.)
All the guys from the yard
They shout to the painters: ... (hurray)
Tale about the letter U
About a little spider
On the shore of the pond, in the dill, there lived a small, small spider, who was afraid of flies more than anything in the world.
All the beetles, snails, snakes, frogs, ducklings and even the flies themselves laughed at him, and his brothers - the big spiders - scolded him and called him a quitter.
“I need to prove to everyone that I’m not a quitter,” the little spider decided.
And one night he picked a large bouquet of red poppies and painted all the cobwebs in the garden with them.
“The brothers will be happy in the morning,” thought the satisfied spider, “it’s so beautiful - the red web!”
But alas! The next morning, the evil, despicable big spiders, swearing terribly, washed their webs.
The flies immediately noticed the red nets, and none of them were caught.
And the little spider was so scared that it ran far, far away. And now no one knows where he lives...
Riddles for children starting with the letter U
Two antennas on the top of the head,
And she sits in the hut,
She's carrying her,
It crawls very slowly.
(Snail)
Horns came out onto the path.
You won't butt?
I touched them a little
The horns hid again.
(Snail)
Along the river, along the water
A line of boats is floating.
There's a ship ahead,
He leads everyone with him!
(Duck with ducklings)
What is it with Galochka?
A thread on a stick
Stick in hand
And a thread in the river.
(Fishing rod)
Amazing child!
Just got out of diapers,
Can swim and dive
Like his own mother.
(Duckling)
Through the linen country,
Along the Prostynya River
The ship sails back and forth,
And behind him there is such a smooth surface -
Not a wrinkle to be seen.
(Iron)
Proverbs and sayings starting with the letter U
Learning is the path to skill.
Skillful hands do not know boredom.
A stupid person will judge, but a smart person will judge.
A smart person blames himself, a stupid person blames his friend.
There is no boredom when your hands are busy.
Pick up a book and you won't be bored.
If you know how to make mistakes, you can also get better.
The morning is wiser than the evening.
Take it together - it won't be too heavy.
Better a scientist than a gilded one.
Friendship has no boundaries, knowledge has no bottom.
Poems about the letter U for children
The snail asks the duck:
Throw a fishing rod into the river.
The duck threw -
I took out the bleak fish.
(G. Satir)
Like a snail before bed
It's boring in your house!
Trying to invent a fairy tale
It turns out to be a sad fairy tale.
(G. Vieru)
Snail-snail,
You walk briskly:
From the gate to me
You'll crawl for four days.
(Ya. Akim)
Little duckling by the pond
The mother duck calls out in fear:
“Oh, I'm afraid!
The midge will bite
Help me escape."
(F. Bobylev)
In all honesty I will say:
I feel bad, I feel bad, AWESOME,
I look very ugly...
But I am not poisonous!
(B. Zakhoder)
Amazing people -
A bird named hoopoe.
Not cut, not combed.
A red tuft sticks out above the nose -
The whole hairstyle is on weight,
There are even feathers on the nose.
Hair salon, apparently
Doesn't work in the forest.
(A. Pudval)
The bell rang and stopped.
The lesson begins.
We sat down together at our desks
And we looked at the board,
And they opened it quickly
Twenty-nine ABC books.
We learned the letter A
We learned the letter U.
The kids scream UA.
We are screaming AU in the forest.
From the letter A - watermelon and stork
(We tried to remember).
Starting with the letter U, guys.
Ear, fishing rod, ducklings...
Here's what for the first time
I learned first grade.
(L. Demyanov)
Lion Tamer
Will surprise students:
Tames the lion and lioness,
He's terribly afraid of mice!
(V. Berestov)
The teacher is in my briefcase!
Who? It can not be! Really?
Take a look, please! He is here.
It's called a textbook.
(V. Berestov)
The student learned his lessons -
His cheeks are inky.
(S. Marshak)
At the edge
Two old ladies
We took milk mushrooms
And waves.
Owl: - Wow!
Owl: - Wow!
The old women's spirits froze.
Creepy!
(E. Blaginina)
Lesson summary:
- Pronunciation of new words increases the preschooler’s vocabulary, develops speech and memory.
- Cell exercises develop fine motor skills of the hands.
- Riddles develop children's intelligence, ability to analyze and prove. Teachers use riddles when teaching children to increase interest during complex tasks.
- Poems influence not only the development of memory. It has been proven that if you learn a few lines every day, new neural connections appear in the brain and your overall learning ability increases.
Topic: “Sound and object image of the letter Y.”
Objectives: consolidate knowledge about the letter U;
enrich vocabulary;
develop thinking, memory, attention;
promote the development of creative activity, intonation of speech;
strengthen the ability to work independently.
Equipment: toy Cat, bag, cards - tables, cut letters
ABCs, handouts - cards.
1. Emotional mood.
Ok-ok-ok-ok - the lesson begins.
Mi-mi-mi-mi - quickly raise your hand.
Vet-vet-vet-vet - answer my question
It-it-it-it - is it good to live together?
2. Sound image of a letter.
Listen to the poem and try to determine which sound occurs most often.
Yulka, Yulenka, Yula,
Yulka was nimble.
Sit still Yulka
I couldn't for a minute.
3. Phonetic exercise.
How does a spinning top sing?
(Yu-yu-yu-yu-yu-yu-yu.)
4. Consolidating knowledge about the letter Y (sound image).
Who guessed which old friend would come to our lesson?
(This is the letter Y.)
5. Subject image of the letter Y.
Remember the poem about the letter.
(So that O doesn't roll away
I'll nail it firmly to the post.
Oh look,
What's happened?
The result is... the letter Y.)
Who remembers what the letter Y looks like?
Children print a letter on the board.
6. Reading words from the board.
Write on the magnetic board:
La class in la.
Ra go. pka yes.
N. rasal. t know
L. yes br. ki dream.
The teacher looks for letters on magnets and doesn’t find them.
Someone scratches at the door and meows.
Who's that behind the door?
The teacher brings in a toy (cat) and introduces the children to the cat Bayusha.
He has a bag. The teacher takes a letter out of the bag and reads the message
from Baba Yaga:
I took the letters from you
For myself, I have spares.
If you need them -
Here are my assignments.
Complete the tasks - then I will return the letters.
1- task. Say the word.
Spinning on one leg
Carefree, cheerful.
A dancer in a colorful skirt,
Musical. . . spinning top
Pigs love the letter Y.
You can't tell without it. . . oink.
In a forest clearing
On a clear day in June
Crybaby near the nanny
Dissolves. . . nurses
Does the letter Y have friends in the class?
Julia reads a poem.
I sewed a skirt for a doll,
I'll cut a new jacket.
The doll says to me: “Mom.”
So I’m sewing for my daughter.
Task 2. Selection of words.
This is not a simple bag. You must collect here words with the letter Y.
If the bag is full, then maybe I will return the letters to you.
Bayush's cat "collects" words into a bag.
7. Physical education lesson “Guess it.”
Students come to the board one by one and show the movements.
Children repeat the movements and complete the sentences.
I sing. I speak.
I'm drawing. I think.
I am sleeping. I fly.
I catch. I sew.
8. Reading (intonation).
My cat Bayusha is visiting you. But I, Baba Yaga, don’t always call him that.
Now you will read what I call it. Be sure to think I
I say kindly, but where I get angry with him.
Children receive pieces of paper with words written on them:
Kotok Bayun, Kotok Bayunok, Kotishche Bayunische, Kotok Bayunochek,
Kitty Bayunotik, Kotofey Bayufey, Kotyara Bayunyara, Kitten Bayunotenka.
3 – task. Intonated reading.
9. Determining the place of sound in words.
4 – task.
The cat wants to help the guys. He offers to sing his favorite song so that the guys can hear Yu’s sound better.
I sing yu-yu-yu
My song.
I sing yu-yu-yu
Cheerful, good, my beloved yu-yu-yu, yu-yu-yu.
Now I read the words, and if you hear a sound at the beginning of a word, clap your hands, in the middle of the word, stomp your hands, and at the end of the word, stomp.
South, spinning top, Nyura, duchess, jeweler, cabin boy, endure, sleep, people, Yura, salute, hook, young man, sew, tulip, hatch.
10. The letters are returned to the children.
Using these letters, children read words on a magnetic board.
11. Working with the textbook.
a) viewing a textbook page
b) exercise “Vigilant Hunter”: who can quickly count words with the letter U in 1 - text,
c) reading texts of choice.
12. Modeling the letter Y.
Make the letter Y and come up with a story about it.
What was the main letter today?
What did you find out about her?
Thank you for the work you have done. I tell you: “Well done!” And you turn to each other and say too: “Well done!”
TECHNIQUES FOR FORMING A GRAPHIC IMAGE OF A LETTER
IN CHILDREN WITH SPECIAL DISTRIBUTION AND INTELLECTUAL DISABILITIES
Low level of cognitive activity, immaturity of motivation for learning activities, reduced performance in receiving and processing information, limited fragmented knowledge and ideas about the world around us, insufficient formation of mental operations, lag in speech development while maintaining the analyzers necessary for the favorable development of speech in children with delays mental development and intellectual disabilities require a non-standard approach from the teacher in explaining and reinforcing educational material. Repeated repetition of information when exposed to various analyzers and channels of perception gives positive results.
1. Using a sandograph
Equipment: pescograph
a) On wet sand, the teacher draws the letter being studied with his finger. The child is asked to use a finger or a small toy to follow the path of the drawn letter. Next, the child writes the letter independently. (This exercise is especially effective for children with impaired fine motor skills, cerebral palsy with partial paralysis of the arms, cuts, uncontrolled stereotypic movements)
b) On dry sand on a backlit glass panel, the teacher writes a letter and invites the child to “walk” with his finger along the illuminated path. Next, the child copies the letter he has learned, and later writes it independently or with the help of the teacher.
2.Using LED glassgraph
ABOUT  Equipment: LED glassgraph, fluorescent markers, substrate with a sample of the letter being studied
A sample letter is attached to the LED glassgraph. The light is selected that corresponds to the psycho-emotional and somatic state of the child. The teacher writes the letter being studied with a marker on the glass, then the child is asked to write this letter independently.
3. Using a math tablet
ABOUT  Equipment: math tablet, rubber bands
On a math tablet, the teacher uses rubber bands to construct a letter. Next, the child follows the model, and then independently constructs the letter.
4. Using a tablet “Mobile application”
Equipment: “Mobile application” tablet, red and blue adhesive tape

On the tablet, the teacher lays out a letter from red stripes (for vowels) or from blue stripes (for consonants) and asks the child to repeat.
5. Using a lacing tablet
Equipment: personal lacing tablet (rattan covering in A-4 format), bright cords, a set of studied letters
a) The teacher “embroiders” the image of the letter with cords and asks the child to repeat.
b) The teacher asks the child to perform “embroidery” according to the instructions ( 5 steps up, 3 steps right, etc.) Next, the child compares the image obtained on the tablet with the letters he has studied and names the one he came up with.
6. Using LEGO
Equipment: LEGO constructor, set of studied letters
a) The teacher collects an image of a letter from a construction set and asks the child to repeat it.
b) The teacher asks the child to complete the construction according to the instructions ( Connect 5 large blocks with, 3 small ones with a turn to the right, etc.) Next, the child compares the image obtained during construction with the letters he studied and names the one he came up with.
7. Using a paper constructor
Equipment: paper constructor, letter to study
The child is asked to look at the letter, “take a picture” with his eyes, close his eyes, imagine the image of the letter, and look at the details of the construction set:
a) assemble the letter yourself;
b) assemble with the help of a teacher;
c) assemble by placing parts of the construction kit on the sample
8. Using plasticine
Equipment: glass “notebook” (A-4 format, glass thickness No. 3, preferably with lines), plasticine, a backing with the image of a letter, A-4 modeling board
The child is asked to roll “threads” out of plasticine and lay out a letter on the backing according to the pattern. (especially effective for forming a graphic image of a capital letter)
9. Using various objects
Equipment: glass pebbles for an aquarium, fruit models
The child is asked to lay out the letter being studied from the proposed objects.
10. Using push pins
Equipment: multi-colored push pins, smooth polystyrene foam tiles (A-4 format)
An image of a letter is applied to the tile and the child is invited to “draw” it with buttons,
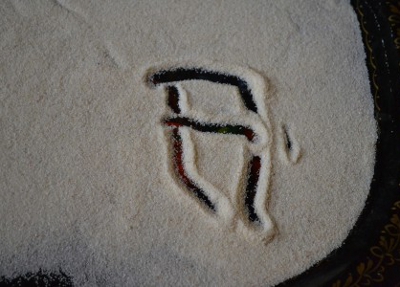
11. Using thread writing

Equipment: screen made of velvet paper (A-4 format), woolen threads of different colors
The teacher demonstrates an example of a letter “written” with thread or threads on the screen. (Children are surprised to see that an ordinary thread without glue does not fall) Next, the child is asked to “write” a letter.
12. Using letter patterns
Equipment: fabric bag, letter models
The child is offered
a) with both hands, feel for the letter in the “magic” bag and determine what kind of letter it is
b) with one hand, feel for the letter in the “magic” bag and determine what kind of letter it is.
13. Using matches or counting sticks
Equipment: matches, counting sticks
The child is asked to use a model or independently to lay out a letter using matches or counting sticks.
14. Using the body
The teacher shows how to use the body to depict a letter. Next, the child is asked to draw the letter himself.
The proposed techniques allow not only to develop graphomotor skills of children in this category, but also to correct fine motor skills of the hands, disorders of articulatory and grapho-motor coordination (impaired calligraphy), visual-spatial disorders, instability of the graphic image of numbers and letters, prevent mirroring and rearrangement of them when reading and writing, difficulties in orientation within the notebook sheet, violations of sound-letter analysis and the sound structure of words, difficulties in mastering logical and grammatical structures of the language, limited vocabulary, disturbances in visual and auditory functions, difficulties in concentration and distribution of attention.
Summary: What is a letter? Letters and sounds. Vowels and consonants. Several games for remembering the spelling of letters. Games for identifying sounds in words. The game is to come up with a word starting with a given letter. We learn to distinguish letters that are similar in spelling. A game for identifying letters by sound. Online games with letters.
Before you start playing with your child, let's figure out what a letter is. A letter is a combination of graphic elements (vertical, horizontal, diagonal lines, circles and semicircles); the letter represents the sound of speech (what we pronounce). Hence the two main tasks that adults face:
Teach your child to recognize and correctly name letters as combinations of different elements;
Teach the child to correlate this combination of elements with speech sounds.
There are 33 letters in the Russian language, only 31 of them represent sounds (Ъ and ь do not represent sounds). The letters and sounds of the Russian language are divided into vowels and consonants.
There are only 6 vowel sounds. These are A, O, U, E, Y, I. And there are 10 vowel letters: the above listed A, O, U, E, Y, I and 4 more “insidious” letters - I, Yu , E, E. These special letters denote two sounds at once if they are at the beginning of a word, or after another vowel letter. So, the letter I = YA (in the word YAMA or MY, for example), the letter Y = YU (in the words YULA or SKIRT), the letter E = YE (FIRE or EGOR), and the letter E = YO (YOLKA, HEDGEHOG). And after consonant sounds, these letters represent other sounds. So, I = A (in the word BALL, for example), Y = U (in the word HATCH, for example), E = E (FOREST or SUMMER), and E = O (HONEY or ICE).
Vowels following a consonant can make its pronunciation hard or soft. The hardness of the previous consonant sound is given by the letters A, O, U, Y, E. The softness of the previous consonant sound is indicated by the letters I, E, E, Yu, Y. For example, in the word LUK the sound L is hard, and in the word LYUK the sound L is soft .
Each letter has a name assigned to it in the alphabet. The names of consonant letters do not coincide with the pronunciation of the sounds they represent. For example, the letter K is called “KA” and can denote the hard sound K (in the word CAT, for example) and the soft sound K (in the word KIT, for example).
The question arises. How to teach a child to name letters: as in the alphabet or simplified - with the sounds they represent? Is it worth explaining to a child the features of Russian phonetics?
You need to understand that the basis of learning to read is not the letter, but the sound. Imagine that the child has learned the letters “correctly,” that is, as they are usually called in the alphabet (BE, VE, EN, etc.). Then, when naming letters, he will name two sounds B and E, V and E, E and N. This will make it difficult to merge sounds when reading syllables, as a result of which letter-by-letter reading will be formed. Instead of MA-MA, the child will get "eMA-eMA". Reading some polysyllabic words will become completely inaccessible to the child. Such words will not be read, but will be solved by them like puzzles. For example, the baby will read the word “postcard” as “o-te-ka-er-y-te-ka-a.” It is not surprising that the meaning of a word or sentence when reading letter by letter will very often be incomprehensible to the baby. In general, this method of learning letters complicates and lengthens the path from syllable reading to reading whole words. Thus, it becomes obvious that it is more correct for a child to name consonant letters in a simplified manner, as we call the hard consonant sound that they represent. Not “EM”, but “M”, not “PE”, but “P”, not “HA”, but “X”.
This method of teaching letters does not mean at all that the child should not know that a letter and a sound are different concepts, that a consonant letter can mean two sounds - hard and soft. But it is not for nothing that all these concepts are included in the literacy curriculum in the first grade: to master them, sufficiently mature functions of thinking are needed - analysis, synthesis, generalization, abstraction. But a preschool-age child masters these mental operations only at an elementary level. The time will come and your baby will acquire knowledge of the phonetics of the language and learn the names of letters in the alphabet. In the meantime, he can learn to read without this knowledge.
Another very important question. In what order is it easier for a preschooler to learn letters? If you are not guided by the sequence of letters in any particular “ABC” or “Primer Book,” try to take into account the following points at first.
First, study the vowels A, O, U with your child.
After some time, add the letters I, Y to the exercises.
Start studying consonant letters with those that the child pronounces well (you don’t need to choose L and R for initial lessons, for example).
The first letters to be introduced into the games are the ones that are most often found in Russian speech (you shouldn’t start with Ts or Shch), the simplest in style (you don’t need to memorize D, Zh, 3 first) and those that are sharply different graphically, for example: N, S, P , TO.
You should not enter B and C, R and F, G and T in a row - they are easy to confuse.
While playing, try to teach your child to hear speech sounds, isolate them from words, recognize the appearance of letters, and compare letters with each other in appearance and sound. The more exciting the lessons with letters are, the faster the child’s interest in learning will develop, and the greater his success in mastering reading will be.
Fun mosaic
Goal: memorize letters, learn to make them from a mosaic, develop fine motor skills.
Age: from 4 years.
What you will need: mosaic of any type ("nails", "buttons", "caps", "chips"), the corresponding typesetting cloth for the mosaic.

How to play?
Invite your child to lay out from the mosaic the letter that your joint efforts are currently aimed at memorizing. You can suggest laying out a letter of a given color (based on the possibilities of the mosaic), a given size (large or small), copying a letter from a sample that you make yourself, making a letter larger or smaller than yours.
Note! It is easier to lay out letters from a mosaic that consist only of vertical and horizontal lines. Therefore, first of all, the letters H, E, G, P, T, Ts, Sh, Sh are recommended for compiling a mosaic. The next level of complexity are letters containing inclined lines, for example U, K, X, A, L, D , Zh, M, I. And the most difficult to lay out from the mosaic are letters that include elements of a circle/semicircle (O, S, V, F, E, R, Yu, B, Z, Ch, 3, b, b).
Options:
Invite your child to transform letters from one to another by adding additional mosaic parts, removing unnecessary ones, or moving necessary parts. It will be interesting to transform A into L and vice versa, T into G and vice versa, E into E and vice versa, U into X and vice versa, P into N or I and vice versa, Sh into Sh or C and vice versa.
Lay out a sample letter from the mosaic, let the child look at it carefully and remember it. Close the sample. Invite your child to write out the same letter from memory. When your child completes the task, open the sample. Let the child compare his letter with the model and correct mistakes on his own if he made any.
Plasticine constructor
Goal: memorize letters, learn to sculpt letters from plasticine, develop fine motor skills.
Age: from 4 years.
What you will need: a set of plasticine (check in advance that the plasticine is elastic, not hard or brittle), a modeling board, stack or a disposable plastic knife.

How to play?
Together with your child, make sausages from plasticine of approximately the same thickness and length. You will need 8 such sausages. Divide (cut) 2 sausages in a stack in half. Divide the other 2 sausages into 3 parts each. Make rings from the 4 remaining sausages, securing their edges together. Divide 2 rings in a stack in half so that you get semicircles. Thus, you have a set of parts for composing any letter of the Russian alphabet. Now the child can make letters according to your model or according to his own ideas.
Note! If your child does not yet have the skill of working with plasticine, first teach him the basic techniques for working with this material: practice kneading plasticine, rolling, stretching, and connecting parts.
Options:
You can diversify the game with plasticine construction sets by using plasticine of different colors. Make identical sets of parts in 2-4 colors. Make a letter from pieces of different colors. Check to see if there are still parts in the appropriate colors and sizes to make the same letter. Ask the child to remember the letter, cover the sample (with a box or napkin), and invite the child to lay out exactly the same letter.
Works made from plasticine construction sets can become gifts for your baby’s family and friends. To do this, together with your child, lay out the first letter of the name of the person to whom the gift will be intended, attach it to bright cardboard, decorate it with a stack (draw dashes, squares, dots, wavy lines on it) or attach small pebbles, beads, plant seeds to the letter , cereal
Magic wands
Goal: memorize letters, learn to lay out letters from sticks, learn to transform letters.
Age: from 4 years.
What you'll need: Counting sticks.
How to play?
The easiest way is to lay out letters from sticks according to a pattern or without a pattern (according to the idea). When the child learns to lay out letters from sticks on his own, you can move on to a more complex level of the game. For example, make a shape out of sticks that resembles a door.

Ask the child to remove 2 sticks so that the letter P is formed, then restore the figure, ask the child to remove 2 sticks again, but this time to form the letter N. Children like this game, they feel like “wizards”. Don't forget to play along with your child so that he gets the most out of completing the tasks.
Next time, invite the child to make other letters from the “Door” figure: remove 1 stick so that you get the letter B; remove 2 sticks to form the letter E; remove 2 sticks to form the letter P; remove 4 sticks to form the letter G.
Magic transformations can also occur with another figure; it resembles a window.

From this magic figure you can make the following letters: the letter F (if you remove 4 sticks), the letter Y (if you remove 3 sticks), the letter W (if you remove 4 sticks).
Options:
Invite your child to perform a chain of transformations of letters made up of “magic” wands: from the letter B to make the letter b; make the letter B from the letter B; make the letter P from the letter B; make F from the letter P, and make Z from the letter F.
Smart cubes
Goal: memorize letters, learn to lay out letters from cubes, learn to transform letters.
Age: from 4 years.
What you will need: cubes.
How to play?
Any cubes of the same size are suitable for the game - both without a picture and with pictures (including from games like “Make a picture”). The easiest way is to lay out letters from cubes according to a pattern or without a pattern (according to presentation). Of course, not all letters can be laid out this way, but only those that do not contain round or semicircular elements. For example: E, E, N, G, T, Sh, C, Shch, Ch, M, U, I, K.

Once your child has practiced making letters from cubes, you can encourage him to transform letters made from cubes. It will be interesting to make the letter G from the letter T, removing the extra cube, moving one cube in the letter H so that the letter P is formed, “transforming” E into E, and Sh into Sh or C.
Rope letters
Goal: memorize letters, learn to lay out letters from strings, develop fine motor skills.
Age: from 5 years.
What you will need: colored cardboard, pieces of various kinds of ropes (braid, thick threads for knitting), a simple pencil, PVA glue (preferably in a bottle with a dispenser spout), a scarf or scarf.

How to play?
Tell your child that you will make unusual letters together. Ask what letter he would like to make, or suggest a letter yourself - a new one, or perhaps one that the child has not yet learned well. On a sheet of cardboard, draw the selected letter with a simple pencil. Give the child glue, let the child apply glue along the contour - “write” a letter with glue. While the glue is still wet, place a string on the outline. If the string is too long for this letter, cut off the rest. Let the craft dry.
Invite your child to feel the unusual letter and “memorize it with his hands.”
Make several of these letters, let the child recognize them by touch, blindfolded, and find one letter out of several suggested according to your assignment. Limit the feeling of the letter, move the child’s hand over only one fragment of the letter, asking him to guess it.
You can use the letters made for this game later to make syllables and words from them. Blindfold the child's eyes with a handkerchief or scarf, lay out the letters of the intended word (no more than 3-4 letters) in front of him, let him feel the rope letters and make a word from them.
Tactile letters
Age: from 4 years.
What you will need: sandpaper, velvet paper, scissors.
How to play?
Cut out letters from sandpaper or velvet paper. The child will have to identify the letter by touch with his eyes closed.
Magic semolina
Goal: memorize letters, develop fine motor skills.
Age: from 4 years.
What you will need: a brightly colored dish tray, semolina.
How to play?
Spread a thin layer of semolina onto a tray. Show your child how to write letters on semolina directly with your finger or a stick. Ask him to write next to the letter the same as you wrote, to write a letter larger or smaller than yours, to complete an unfinished letter, or to erase the extra detail of the “wrong” letter.
On such a screen, any child will be pleased to learn to write letters: after all, all you have to do is shake the tray a little, and the mistake or inaccuracy made will disappear!
Dreamers, or what the letter looks like
Goal: memorize letters, develop imagination
Age: from 4 years.
What you will need: drawing paper, colored pencils, markers, wax crayons, watercolors, gouache.

How to play?
To make it easier for a child to remember letters, it is useful to compare letters with different objects from the environment. Write a letter and ask your child to think of what it looks like. Draw the letter to the object yourself or invite your child to do it. Try to keep the drawing bright and funny.
Below are some of the most common comparisons between letters and different objects or parts of objects.
A - a ladder, a tree trunk with a hollow, the roof of a house.
B - drum and sticks, kangaroo.
B - glasses, a pretzel, a butterfly that folded its wings.
G - braid, semaphore.
D - house, car.
E - broken comb.
Yo - the hedgehog carries two apples on his back.
F - beetle, snowflake.
3 - snake, bird in flight.
And - a tree, and next to a mountain, a needle and thread.
Y - there is a tree and a mountain nearby, a bird above them.
K - a bird with an open beak, a crocodile has its mouth open.
L - the ribbons in the braid came undone.
M - two mountains, a T-shirt, a swing, a broken bench.
N - stretcher, crib.
O - face, sun, plate, pie.
P - swing, gate.
R - chamomile.
C - drying, elephant ear.
T - hammer.
U - hare ears.
F - eagle owl, a man with his hands on his belt.
X - spinner, acrobat.
C - the kitten or puppy lies on its back, paws up.
H - flag, hanger, overturned chair.
Sh - hedgehog.
Sh - brush.
b is the key.
Y - skis and ski poles nearby.
Kommersant is a ladle.
E - echo.
Yu-yula, branch with an apple.
I am a man with a backpack over my shoulders, a cockerel.
It will be very good if your child sees letters in other objects of the surrounding world or in the images of animals and people.
If you draw pictures of the letters in an album, arranging them in alphabetical order, you will get a unique children's alphabet. You can use this book yourself for a long time, and then pass it on as an “inheritance” to a younger child, your child’s friends, or leave it in a kindergarten group.
Home alphabet
Age: from 4 years.
What you will need: drawing tablet/sketchbook/string sketchbook, colored pencils, markers, wax crayons, watercolors, gouache, magazines/catalogs/postcards/stickers, scissors, glue.

How to play?
Very often, parents buy alphabet posters for their children. Such posters help the child memorize letters. But on them, each letter corresponds to only one subject picture, the name of which begins with this letter. Children quickly remember the proposed matches, and interest in the poster gradually disappears.
You can make a better version of this teaching aid with your child using pictures from magazines or catalogues, postcards or stickers.
It is best to start making such a “Home Alphabet” immediately after your child starts teaching letters. Make the first “page” of the alphabet as soon as you introduce the child to his first letter. Write this letter brightly and elegantly on a piece of paper and let the child color it. Then, sorting through postcards or stickers, leafing through the pages of magazines or catalogs, look for pictures whose names begin with this letter, cut them out and paste them onto the “page” of the alphabet. Along with the number of letters the child learns, the number of “pages” of the alphabet will also increase. Each “page” can be supplemented in the process of learning letters if you come across any new suitable picture.
Decorate the walls of the children's room with “pages” of the alphabet. The kid will be pleased to learn using this alphabet: after all, he “made it” himself!
You can make an alphabet on a piece of Whatman paper. To do this, first draw whatman paper into 33 identical rectangles. Write the letters in each, following alphabetical order. As you learn the letters, fill in the boxes with pictures that start with those letters.
Homemade alphabet
An even more interesting version of the game is shown in the photo below. For this game with letters, you will need to select in advance small objects and toys that you have in the house. You can make figures from plasticine or salt dough, or even use edible props for the game that will not stain the playing field. Put the items in a box or bag, you can constantly replenish your props for playing with your child.

How to play? Print out the game board. Glue it together. The child must take out one object at a time from the box (bag) and place them on the playing field depending on what letter they begin with.
Album for letters
Goal: memorize letters, learn to identify the first sound in words.
Age: from 4 years.
What you will need: photo album for 36 photographs 10x15 cm, white cardboard cards (10x15 cm, 66 pieces), colored pencils, felt-tip pens, wax crayons, watercolor paints, gouache, magazines/catalogs/postcards/stickers, scissors, glue.
How to play?
Using a regular photo album, pictures from magazines and catalogs, postcards and stickers, you can make a useful aid for your child to learn letters.
On white cardboard cards, using colored pencils or felt-tip pens, watercolors or gouache, write large and beautiful letters of the alphabet.
Insert these cards into a photo album, placing them on the left side of the page. Match pictures with letters of the alphabet. The more pictures you select, the brighter the guide will be and the more interesting it will be for your child to study with it. Glue pictures starting with the same letters onto the remaining cardboard cards. Insert cards with subject pictures accordingly into the spread of the photo album on the right. The album is ready!
The child, looking at the pictures and letters in the album, will unobtrusively remember the letters. You can take such an album with you on the road or for a walk, without fear that your child will spoil it or get it dirty - after all, the letters and pictures in it are protected by film.
Smart charging
Goal: memorize letters based on an image.
Age: from 4 years.
What you will need: two pillows, a rug.
How to play?
Any child will be interested in becoming a letter. Show your child how to turn into letters.
Letter A - place your feet shoulder-width apart, fold your hands behind your lower back.
Letter B - place a pillow on your stomach with one hand, extend the other hand forward.
Letter B - press two pillows towards you.
Letter G - stretch your arms forward, clasp your fingers.
Letter D - sit with your child on the carpet with your backs to each other, bend your legs slightly at the knees.
Letter E - standing on one leg, stretch the other leg forward, at the same time stretch your arms forward.
The letter E is the same as the letter E, with a wink.
Letter F - place your feet shoulder-width apart, bend your arms at the elbows and lift them up.
Letter 3 - lying on your side, bend your knees, move your head back, bend back.
Letter I - join your hands behind your back, one hand through your forearm and the other through your lower back.
The letter Y is the same as the letter I, but nod your head.
Letter K - stretch your right leg forward, place it on your toes, bend your right arm at the elbow and lift it up.
Letter L - place your feet shoulder-width apart, press your hands to your body.
Letter M - stand with the child opposite each other and hold hands, lower your arms down.
Letter N - stand with the child opposite each other, stretch your arms forward; let him put his hands on yours.
Letter 0 - join your hands above your head, forming a circle.
Letter P - spread your arms to the sides, bent at the elbows, turn your palms towards your body.
Letter P - place both hands, palms to your forehead, elbows together.
Letter C - lying on your side, bend into a semicircle shape.
Letter T - extend both arms out to the sides.
Letter U - standing, extend your left arm along your body; Press the shoulder of your right hand to your chest, move your forearm slightly down, close your fingers and straighten them.
Letter F - place your hands on your belt.
Letter X - place your feet shoulder-width apart, raise your arms up and spread them slightly to the sides.
Letter C - bend your right arm up at the elbow and move it to the side, place your left hand parallel to your right, moving it also to the right.
Letter H - join your arms in front of you with your elbows bent.
Letter Ш - spread your arms to the sides, elbows bent, forearms raised up, palms turned towards the body.
The letter Ш is the same as the letter Ш, but stamp with your left foot.
Letter B - place a pillow on your stomach, move one arm, bent at the elbow, back and up.
Letter Y - place a pillow on your stomach, and place your child opposite you.
Letter b - place a pillow on your stomach.
Letter E - take your right leg to the side, place it on your heel, raise your left arm up and bend to the right, bend your right arm at the elbow and press it to your body.
Letter Y - hold the pillow in front of you with your arms outstretched.
Letter I - place your right hand on your belt, move your right leg to the right and place it on your heel.
First, invite your child to repeat these “shapes” after you. Ask your child to think of a different way to represent the letters. If possible, take pictures of your child as he or she makes different letters. With the help of these photographs, you will be able to compose syllables and words together with your baby.
Don't tell your child what letters you are turning into; let him guess. And next time the baby will show the letters.
Magic bag
Age: from 4 years.
What you will need: letters from the set (plastic or magnetic), a bag.

How to play?
An opaque plastic bag or gift bag may be suitable for the game.
Place the letters your child knows into a bag. Offer to take out the letters one by one, guess them by touch, and come up with a word starting with this letter. If the child makes a mistake in the name when taking out a letter, correct it and put the letter back in the bag. When the child takes out this letter again, he will already name it correctly.
You can also put new letters for the child in the bag, but there should be no more than 1-3 of them per game.
After playing with the magic bag a few times, place a few small items in the bag to keep the game interesting. This could be: a paperclip, a cap from a felt-tip pen, a button, a cap from a plastic bottle, a counting stick, a number from a set, a geometric figure, etc.
Invite your child to come up with words that end with the letter from the bag. Do not use the letters B, D, V, G, Zh, 3 for this task, because at the end of the word they are heard differently. You can come up with words that contain a missing letter (regardless of its place in the word).
Smart hide and seek
Age: from 4 years.
What you will need: colored paper, white paper, scissors, colored pencils or markers, paper clips, tape.
How to play?
Cut out large three-dimensional letters from colored paper or write them on album sheets with colored pencils (felt-tip pens). For one game, 5-7 letters are enough. Of these, no more than 3 are new for the child.
Hide all the letters somewhere in the apartment (or room) so that only small fragments of them remain visible. You can hide the letters: behind a mirror, under a closet, behind a curtain, in a book, in a desk drawer, on the ceiling, under a pillow, behind a lampshade, etc. Use tape or paper clips to attach the letters. Do all the preparatory work without the child.
Tell your child that the letters are playing hide and seek with him. Offer to find the letters.
The child will be interested in finding both familiar and new letters. If the child sees a letter that is familiar to him, before he takes it out, ask him to guess from the visible part what kind of letter it is. To better memorize new letters, you can place them in “special” places. For example: the letter X can be hidden in the refrigerator, the letter 3 - behind the mirror, the letter K - in a dresser drawer, the letter C - in a pot with an indoor flower, the letter B - hung on a hanger in the hallway, etc.
Age: from 4 years.
What you will need: colored paper, white paper, scissors, colored pencils or markers, paper clips.
How to play?
Cut out bright large flowers of different shapes from colored paper. To organize the game, 6-10 colors are enough. From white paper, cut out the “centers” of flowers of the appropriate size. Determine which letters would be useful for your child to work with now. Write the letters on the “centers” and attach them to the flowers using paper clips. Place flowers on the floor.
“Turn” a child into a butterfly: read a poem about a butterfly or give the child a large scarf - “wings” - in his hands. Tell the “butterfly” which flower to land on. Swap roles: now let the child name the letters on which you will “land.”
To play with other letters, you do not need to cut out new flowers, you just need to write the “middles” and attach them to the old flowers.
Note! For the game, it is useful to choose flowers-letters that are similar to each other - having the same elements. For example, in one game use the letters P, N, I, T, G, E, Sh, and the next time write the letters V, B, R, S, 3, Z, F on the flowers.
Write the letters on regular sheets of paper - these will be airfields. Using a poem or an imitation exercise (arms to the sides, honking), “turn” the child into an airplane and command which airfield to land on. A boy will like this version of the game more.
Letters on the back
Goal: remember letters, develop attention.
Age: from 4 years.
What you'll need: No props needed for this game.

How to play?
Play riddles with your child. Simply “write” the letter he knows on your child’s back with your index finger or the blunt end of a pencil. Ask what letter you wrote. Invite your child to write a letter on your back and you can guess. Guess the letters one by one.
In this way, it is useful to memorize letters that a child cannot, for some reason, learn firmly.
You write on the child’s back, and he simultaneously writes the same letter with chalk on the board or with a felt-tip pen on paper.
Find the same letters
Goal: remember letters, develop attention.
Age: from 4 years.
How to play?
For this game, you must first prepare cards with letters. Cut the cardboard into rectangles and write one letter on each card. The letters must be written in several options (styles), two letters of each option. Letters may vary in size, color, and font style. Lay out the letters in front of your child. Invite him to find paired - identical letters. Don't forget to ask your child what letters he found.
Let the child sort the letters into groups: large and small, by color, by writing style. Then he will name all the letters in each group.
Cut the letters
Goal: memorize letters, learn to distinguish letters with similar spellings, develop spatial thinking.
Age: from 4 years.
What you will need: white cardboard, colored pencils or markers, scissors.
How to play?
For this game, you must first prepare cards with letters. Cut the cardboard into rectangles measuring approximately 13x18cm. Write one letter on each card. First cut the cards into two parts. Invite your child to collect letters by presenting the parts in different ways: parts of one letter, parts of one letter + one part of another letter, parts of 2-3 letters at the same time.
To form several letters at the same time and to form a letter using an extra piece, it is important that all letters are written with the same color felt-tip pen. Otherwise, the color will become an obvious clue for the child.

Then you can cut the same cards again - so that you get 3-5 parts of one letter. If you successfully compose letters from 5 parts, you can cut a few more parts until you get 8 parts. Use different ways to cut the letter: horizontally, vertically, diagonally.
The same letter can be wished upon a child several times, cutting it differently each time.
Pay special attention to the selection of letters for simultaneous folding. First, select letters whose differences in style are obvious, for example: A and P, S and I, U and V, L and Yu. Then you can present simultaneously parts of letters with similar spellings, for example: P and V, Sh and E, N and P, V and B, G and T, K and X, M and L, L and A.
Don't forget to ask your child what letter it turned out to be!
Such tasks are very similar to games with cut pictures, which many preschoolers enjoy. Compiling “split letters” contributes not only to memorization, but also to the development of visual and effective thinking, helps to prevent errors in writing letters (mirror writing, writing “upside down”, erroneously writing a letter similar in appearance instead of a given one).
Mirror letters
Age: from 4 years.
What you will need: cardboard, scissors, pencil/marker/pen.
How to play?
Prepare cards of the same size (approximately 8x12 cm) at the rate of 2 pieces for the letters the child has learned. Write 1 letter on each card. The letters must be written in a correct and mirrored (“back to front”) image.

Place a couple of cards with the same letter in front of your child. Ask them to choose the correct letter. Organize your child’s independent check of the task: give him the opportunity to compare the selected letter with letters from the ABC or Primer. Be sure to ask what the letter is called.
This exercise will help you avoid mistakes in writing letters in the future.
A toy shop
Goal: learn to identify the first sound in words, find the corresponding letter.
Age: from 4 years.
What you will need: 5-10 of your child’s toys, the letters with which the names of these toys begin (magnetic/from the cash register/written on small pieces of paper).
How to play?
Organize a store at home. Place different toys “on the counter”: a ball, a doll, a pyramid, a car, etc. The seller is you. The buyer is your child. The main condition is that the product can be purchased only by correctly naming the first sound of the word and “paying” the seller with the corresponding letter.
Swap roles: now you are the buyer, and the child is the seller. When you “buy” toys, specifically choose the wrong letter. The seller will have to refuse your purchase and explain why he cannot sell this toy for the “money” you offered.
Note! There is no need to use items starting with the letters E, E, Z, Yu to play.
Options:
All children love to play “shop,” but to prevent this game from getting boring, and to remember more letters, you can change the “profile” of the store. Today it is a grocery store, and tomorrow it is a sports store. Sell dishes, vegetables and fruits, clothes and shoes, educational supplies.
It is very convenient to use a set of pictures for this game. With the help of pictures, you can “sell” not only those items that are actually laid out by the “seller” on an imaginary counter, but also “products” of a much larger size, for example: transport, furniture, trees, flowers. Such pictures will be useful to you for other games.
Age: from 4 years.

What you will need: toys (for example, a bear, a doll, Pinocchio, a baby doll, a soldier, a tiger cub), postcards, envelopes, colored pencils or markers.
How to play?
Prepare “letters” for toys: put the cards in envelopes, write the “address” on the envelopes - the first letters of the names of the toys (M, K, B, P, S, T). “Turn” your child into a postman: put a bag over his shoulder and put letters in the bag. The child needs to guess which of the toys to give which letter. The main condition for completing the task: the toy receives an envelope on which the first letter of its “name” is written.
Prepare “letters” for your family members: for grandmother - an envelope with the letter B, for grandfather - an envelope with the letter D, for dad - with the letter P, etc. It is especially interesting to play “Mail” before the holidays, for example, before the New Year. If you put real greeting cards addressed to family members in envelopes, your little postman can proudly deliver the holiday mail.
Bring the goods
Goal: learn to identify the first sound in words, remember letters.
Age: from 4 years.
What you will need: 3 trucks, letters from a cut alphabet, tape, small toys - a pyramid, a pistol, a doll, a clown, a cube and a brick from a wooden constructor, a ring, a ball, a scoop, a bucket.
How to play?
All children - both boys and girls - enjoy using cars in their games. The game of “cars”, if you wish, turns into a developing and educational game. This is not difficult to do! Using tape, attach the letters K, P, M to the cars. These will be the “brands” of the cars. Place toys in front of your child. Offer to distribute the loads among the cars. To choose which machine to put the weight in, you need to determine the first sound in the name of the toy and find the corresponding letter on the machine. Cars transport only those items that begin with the letter - the “brand” of the car.
Please note that not all cargo can be transported on these vehicles. Ask your child what other vehicles are needed to transport the remaining toys.
Invite your child to distribute the toys, focusing on the last letter in their name. Remember that toy names ending in G, 3, V, D, Zh, B are not suitable for this task, since these letters at the end of the word indicate other sounds.
Goal: memorize letters, develop coordination of movements.
Age: from 4 years.
What you will need: images of fish (from lotto or from children's magazines/silhouettes cut out of paper), paper clips, colored pencils or markers, string (30 cm long), magnet, ruler (20-30 cm long), tape, hoop ( blue scarf/blue rug/blue blanket), bucket.
How to play?
Before starting the game, you need to make a fishing rod and a “catch”. To make a fishing rod, tie a string to a ruler, and attach a magnet to the end of the string (you can tie it or glue it with tape). Write the letters on the fish that your child is currently memorizing. Attach a paper clip to each fish's nose.
Place a hoop on the floor - it will be a “lake”. Instead of a hoop, you can use a large scarf, blanket, rug, blue or light blue. “Launch” the fish into the lake - put all the fish in a hoop. Now your child, like a “real fisherman,” can fish in the lake. The main rule of the game: only that fish is considered caught, the “name” of which (the letter attached to it) the child can recognize. The fisherman's entire catch is put into a bucket.
Note! Before starting the game, decide for yourself whether it is more useful for your child to turn the fish over in the lake - letters up or letters down. If a child sees what letters are written on the fish, then perhaps he will not deliberately “catch” fish with letters that are unfamiliar to him. On the other hand, if the fish are turned upside down, you can tell your child which fish to catch. In this version of the game, the child will need to remember what the letter you named looks like, and after the child catches the corresponding fish, he will only repeat the name of the letter written on the fish.
Letter dress
Goal: memorize letters, develop fine motor skills.
Age: from 5 years.
What you will need: a set of white cardboard, a set of colored paper, PVA glue, a glue brush, a simple pencil.
How to play?
First, determine which letter your child would be interested in “making a dress for”: maybe it’s the first letter of his name, or maybe you want to “make a dress” for a letter that your child can’t remember for a long time, or for the letter you will introduce him to today.
On a piece of cardboard, use a simple pencil to draw the outline of the selected letter. Discuss with your child what color dress he would like to make for this letter; you can offer to choose several colors for the dress.
Tear small pieces from sheets of paper of the selected colors, spread them with glue, apply the pieces to the cardboard, filling the outline of the letter with them. If your child has chosen several colors to work with, tell him how to arrange the pieces of different colors. For example: glue them in any way you like (you get a colorful dress), glue pieces of one color at the bottom, pieces of a different color in the middle, and pieces of a third color at the top (you get a striped dress), etc. Draw the child’s attention to the fact that the pieces must be glued tightly to each other, “so that there are no holes in the dress.”
The color of the dress can be chosen based on the names of different colors. So, for the letter K, a red or brown dress is suitable; for the letter C - blue, gray, lilac; for the letter G - blue, for the letter Z - yellow; for letter 3 - green; for the letter P - pink; for the letter F - purple; for the letter 0 it is orange, and for the letter H it is black. You can choose a "design" that matches the letter. For example, the letter C will wear a colored dress (floral/multi-colored), the letter M will become a sailor and wear a vest. This choice of color and decoration method will contribute to better memory.
If your child likes this type of paper work, you can make all the letters of the alphabet with him as he learns them, coming up with a dress color for each letter.
The letters turn out incredibly fluffy, soft and cute if you use colored (with a pattern) or multi-colored paper napkins instead of plain paper.
Letter constructor
Goal: memorize letters, learn to lay out letters from individual parts.
Age: from 5 years.
What you will need: a set of colored cardboard, a simple pencil, a ruler, a compass, scissors.
How to play?
Before starting the game, make the construction kit parts. Cut out 8 strips of cardboard with lengths of 12, 6, 3 and 1.5 cm. The width of all strips is 1.5 cm. Using a compass, draw a circle with a diameter of 6 cm on the cardboard, draw a circle with a diameter of 4.5 cm inside it. Cut out the resulting ring and cut it into two half rings. You will need 6 such half rings. Cut another ring of the given size into 4 identical sectors (a quarter of the ring each).

Together with your child, make letters from the details of the construction set: offer to figure out how to make a given letter on your own, ask to make a letter according to your model.
Make an incorrect letter (in a mirror image - “back to front” or inverted - “upside down”), let the child rearrange the parts so that the correct letter is obtained.
Convert the letters. For example, place one large stick and ask your child to add just one piece to make a letter. The next move is yours - add details or swap them to make a new letter. Next, the child will transform the letter you laid out into another. Take turns. The following rows of letters are possible: T-G-P-N-M; I-F-R-V-B-B-Y-Y.
Travel game
Goal: memorize letters, learn to come up with a word starting with a given letter.
Age: from 5 years.
What you will need: Whatman paper or a piece of wallpaper, templates with geometric shapes, a simple pencil, colored pencils or markers, object pictures, scissors, glue, chips (small toys/buttons), dice.
How to play?
On a piece of Whatman paper, draw a travel route - a curved, open line. Along this line, using a template with geometric shapes, draw stopping points with colored pencils or felt-tip pens. Write letters in geometric shapes.
Choose one chip for yourself and your child. Throw the dice one at a time and “walk” for the number of moves you get. Once you find yourself on a stop figure, name the dropped letters and come up with words starting (or ending) with these letters. Anyone who cannot name the letter at the stop or come up with a word moves back one point (skips a turn). The one who reaches the finish line first wins.
If desired, decorate the game with pictures from magazines or postcards, stickers or pictures from the lotto. Using pictures, you can also set the theme of the game: “Journey in the forest”, “Journey through fairy tales”, “Sports”, etc. Make the route more complicated: draw arrows that transition forward and backward for several moves, enter symbols for skipping a move or an additional move (for example, if the piece is on a square - an additional move, and if the piece is red - skip a move).
To create such a guide, you can use the field of a travel board game, just write different letters in the circles.
Letter in the window
Age: from 5 years.
What you will need: white and colored cardboard, colored pencils or markers, scissors.
How to play?
Prepare cards from colored and white cardboard of the same size, approximately 13x18 cm. You may need 3-5 colored cards, and determine the number of white cards based on the number of letters being memorized. Write large letters on white cardstock cards with felt-tip pens. In cards made of colored cardboard, cut out “windows” of different shapes (round, square, triangular, oval, rectangular): one window in each card. It is advisable to cut out the windows not in the middle of the card, but by shifting them slightly up or down.

Hide the card with the letter behind the card with the window. Try to do this so that the child does not see the letter ahead of time. Show your child the window with the letter. Ask him to recognize and name the letter in the window (by fragment).
Note! The same letter can be guessed multiple times by alternating cards with windows or changing the fragment presented in the window (this is easy to do by turning the card with a window upside down).
The game will help you remember the graphic images of letters well, and not confuse the letters when further learning to read.
Attentive eyes
Goal: memorize letters, train attention and observation.
Age: from 5 years.
What you will need: drawing paper, pencil/marker/pen.
How to play?
Copy the pictures onto separate sheets of paper (see figure). Invite your child to guess which letters are hidden in these pictures. Allow your child to turn the sheets in different directions so he can find more letters. If the child cannot recognize a letter, trace it with the blunt end of a pencil, this will help the child guess the letter. Don't say which letter you are showing; if the child can see it, he will name it himself. If the child still cannot see the letter, name it yourself.

It’s easy to come up with tasks like this yourself. The main rule when composing images: the same element (detail) must simultaneously be part of two or more letters. That is, the letters should seem to be inscribed within each other. This way it’s easy to imagine the letters P and B, B and V, B and R, G and T, N and P, A and M, F and Z, K and X, X and F. You can also invite your child to dream up and come up with them on their own similar riddles.
Goal: remember graphic images of letters, learn to recognize the same elements of letters, learn to recognize different elements of letters.
Age: from 4 years.
What you will need: paper (album, notebook, notebook, sheets), colored pencils or markers.
How to play?
Write “damaged” letters (unfinished, with missing details). Tell your child that these letters were damaged by the harmful Letter Eater and ask the child to restore (write/fix) them. Be sure to ask what letter you got.

You can write one of the frequently occurring letter elements (vertical line, horizontal line, slanted line, circle, semicircle) and ask the child to name all the letters that contain this element if there are several answer options.
For example, the right semicircle is found in the letters 3, Ф, ы, В, Р, Е, Б, ь, Ъ, the left semicircle is found in the letters Ф and И, the inclined line is a component of the letters И, Д, У, К, X, Ж , M, a horizontal line is present in the letters A, P, N, T, G, B, E, E, Yu, Sh, Shch, C, D.
This exercise develops visual attention, prevents erroneous naming of letters when reading and incorrect spelling of letters when typing. It is very important to prevent these mistakes, because throughout the entire period of preschool childhood, your child will write using printed letters. The child will begin mastering “written” letters only in the first grade.
Options:
Try to "make a wish" for letters that have 2 identical elements. For example, two vertical lines. Such lines are components of the letters N, I, Y, Y, M, P, Ts, Sh, Sh. Any of the letters listed will be the correct answer to the riddle.
You can also play this game outside: write letters with a stick in the sand or with chalk on the asphalt. In winter, trample letters in the snow or write in the snow with a shovel.
Logic chains
Goal: memorize letters, train attention, develop logical thinking.
Age: from 5 years.
What you will need: drawing paper, pencil/marker/pen.
How to play?
Sitting next to your child, write a chain of letters: A-L-A-L-A. Ask them to guess which letter should come next. Write it down or have your child write the letter himself. Offer to look carefully at the chain of letters again and name which letter should now be next. Write it down. Continue to guess the next 3-5 letters in order.
This task represents a logical pattern - the rule of alternation. You can also offer other types of letter alternation, for example:
A-A-L-L-A-A-L-L
A-L-L-A-L-L-A
A-L-A-P-A-L-A-P, etc.
It is better to first compose such chains from letters that are obviously different from each other, for example: D and V, ZH and T, S and G, 3 and I. Later, when the child learns to see the rules for constructing chains, you can compose them from letters that are similar in spelling and having the same elements. For example: I and M, V and F, F and K, E and W.
If a child finds it difficult to complete a task, help him by saying the entire chain of letters out loud, exaggeratingly pronouncing the names of the letters in different ways (quietly and loudly, in a high and low voice).
This exercise is useful for developing analytical skills and the ability to find patterns, so you can return to it at later stages of learning (when the child reads syllables, words, sentences).
To make chains, use letters from a cut alphabet or from a set of magnetic letters. In this case, the child does not write down the answer, but places the corresponding letters in the continuation of the chain.
Find and cross out
Goal: memorize letters, learn to distinguish letters with similar spellings, train attention.
Age: from 5 years.
What you will need: any text with large font (an old children's book, perhaps a Primer or ABC, advertising flyers from the mailbox), pencil/felt-tip pen/pen.
How to play?
For the first game, choose text with a small number of large letters of the same font and size. Invite your child, carefully looking through the text, to find and cross out the given letter, preferably the one that you are currently memorizing with him. Teach your child to look through all the letters in order and not skip lines. Another time, the letter can be circled, a dot placed under or above it, etc.
If you successfully complete such tasks, complicate the instructions and offer to simultaneously search and cross out (underline/circle) 2 different letters.
The next level of difficulty is to find 2 different letters and designate them in different ways, for example: underline 0, cross out A. When completing tasks in this version, first suggest looking for letters that clearly differ from each other, for example M and T, L and S, Z and N, A and E, F and Sh. Then, when the child learns to alternate different ways of marking the letters he is looking for, offer letters that have similar elements in their spelling, for example N and I, P and N, V and R, B and Y, Shch and C, S and O, F and K, G and T.
Over time, you can replace search text with letters of the same size and font with text or a set of letters of different fonts and sizes. Advertising leaflets or advertisements in newspapers are very suitable for work at this level - they contain letters not only of different fonts and sizes, but also of different colors. Another convenient option for preparing such assignments is to type them on the computer using different styles and different letter sizes.
To complicate the game conditions, you can limit the time you work on a task, for example, work for 1 minute. After the time has expired, you should count the number of letters that the child was able to view. From time to time, the number of letters viewed in 1 minute will increase, which will become a tangible indicator of the child’s success.
Children remain interested in this exercise for a very long time. Therefore, you can return to the game even when your child is already reading well. In this case, the main task will be training attention, concentration, and the ability to follow instructions.
Work on one of these tasks yourself, make mistakes on purpose, invite the child to play the role of a teacher and check the correctness of the task.
The letter is growing
Goal: memorize letters, develop fine motor skills.
Age: from 5 years.
What you will need: drawing paper, colored pencils or markers.
How to play?
Prepare strips of paper approximately 5x20 cm in size. Lay the strip horizontally. On the left side of a strip of paper, “plant” (write) a small letter, for example A. Then write the letter A, gradually increasing its size, until the end of the sheet. The last letter should be written across the entire width of the sheet. Tell your child that this is how “the letter grows.” Invite him to “grow” a letter himself.
If the child cannot increase the size of the letter gradually, or gets stuck on a smaller size, help him with verbal instructions: “And the next letter is a little higher,” “Now a little higher,” “Again, the letter is higher...”
There is another way to help if you have difficulties completing a task. “Turn” the child into a letter, ask to show how the letter grows - first the child stands on his haunches with his head down, then raises his head, gradually stands up, then slowly raises his arms up, and finally stands on his tiptoes.
The exercise perfectly develops fine motor skills and develops the ability to follow instructions.
Options:
You can change the conditions of the task: write by reducing the size of the letter. Then you need to write a letter of maximum size in the left corner of the strip - the entire width of the sheet.
Try to make "slides" from the letters. First, gradually increase the letter size, reaching the maximum approximately in the middle of the strip, and then gradually decrease the size, returning to the original letter size at the very end of the line. Or vice versa - start writing with the largest letter, gradually reduce the size, bringing it to the minimum towards the middle of the sheet, and then gradually increase the letter size, bringing it to the original towards the end of the line.
Letter lotto
Goal: remember letters, develop attention, learn to identify the first sound in words.
Age: from 5 years.
What you will need: drawing paper, ruler, pencil, colored pencils or markers, object pictures (from board games or cut out from magazines), bag.
How to play?
Divide the sheets of paper into 6-8 rectangles of the same size. Write one letter in each rectangle. Write letters large and in bright colors. From board games or from magazines, select pictures whose names begin with letters written on sheets of paper.
Invite your child to choose one of the cards with letters and find the corresponding picture for each letter from those prepared for the game. The letter must be covered with a picture.
When your child learns to find the right pictures, you can play this game with the whole family. The rules of the game are simple. Each family member chooses a card with a letter. One of the family members is the leader. He takes out object pictures from the bag one at a time and asks: “Who needs...?” (says the name of the object shown in the picture). The one who has the corresponding letter takes the picture for himself, covering the letter with it. The first one to cover all the letters on his card wins.
Glue subject pictures onto large cards, take letters out of the bag and cover the pictures with them. The rules of the game are the same. If subject pictures are glued onto large cards by topic (shoes, clothes, animals, birds, fish, insects, trees, flowers, mushrooms, vegetables, fruits, furniture, dishes, pets, wild animals, animals of hot countries, animals of the North), then another goal of the game will be to develop speech and expand the baby’s vocabulary.
Letter traveler
Goal: learn to determine the presence of sound in words, learn to determine the place of sound in a word, memorize letters.
Age: from 5 years.
What you will need: a picture depicting types of passenger transport (plane/train/bus/ship), letters from a set of magnetic letters.
How to play?
Using a ruler and a simple pencil, divide each picture depicting a type of passenger transport into three parts - conditionally the beginning, middle and end of the passenger compartment.

Choose a letter from a set of magnetic letters whose place in the word your child will determine. Select the mode of transport for the "letter journey". Tell your child that a letter can only occupy the seat on the plane/bus/train/ship that is indicated on the ticket. In order to find out what place a letter occupies, you need to determine the place of the sound in the word (at the beginning, in the middle, at the end). You call “Ticket”, and the child places the letter on the vehicle.
For example, you agreed that the letter Sh is traveling today. The child chooses a plane for her. You call "ticket" - the word JOKE (pronounce SH-SH-JOKE in an exaggerated manner). The child determines that the sound Ш in this word is at the beginning of the word and “places” the letter at the beginning of the word. Change the ticket - say the word KAMYSH (pronounce exaggeratedly KAMYSH-SH-SH). The child will “plant” the letter Ш in the tail of the plane. Change the ticket again - say the word ROOF-SH-SHA in an exaggerated manner. The child will “put” the letter Ш in the middle of the cabin, since the sound Ш in the word ROOF is in the middle of the word. Offer your child a fraudulent ticket - the word BEETLE. There is no letter “SH” in this word, so the child will take the letter off the plane.
As “tickets,” use subject pictures whose names contain “travel letter.” Do not forget to offer your child pictures that do not have this letter in their names, so that the child learns to identify its absence in words.
Letter domino
Goal: memorize letters, learn to identify the first sound in words.
Age: from 5 years.
What you will need: white cardboard, object pictures, a simple pencil, ruler, scissors, glue, colored pencils or markers.

How to play?
Currently, there are many options for ready-made educational games with letters like "Dominoes" on sale. All these games, as a rule, have one feature: each set includes only one letter, and only one corresponding picture is selected for each letter. When a child plays such a domino, he quickly remembers the proposed correspondence between letters and pictures, and therefore the game soon becomes uninteresting for the child.
You can make a similar game yourself. To make the game interesting, select not one picture for each letter of the alphabet, but several. Use old magazines, booklets, and catalogs to search for pictures. You may find used sticker books, postcards, and candy wrappers useful.
Make a set of cards of the same size from white cardstock. Determine the size of the card yourself depending on the size of the pictures you selected: the picture should fit on half the card. Make a mark on each card: divide it in half using a pencil and ruler. Write the letters of the alphabet on the right half of the cards, and glue object pictures to the left halves. You can write the letters by hand, print them on a printer, or cut out large letters from magazines/newspapers.
There are no special rules in the selection of pictures and letters for one card. But you need to avoid matching the letter written/pasted on one card and the letter with which the name of the item in the picture begins.
Explain to your child the rules of the game. For each card you need to select another card so that the written letters match the pictures starting with these letters. Take it for yourself and give your child 5-8 cards. Place the remaining cards in a common deck. Build chains of letters and pictures. Take turns. If you or your child do not have a suitable card, take additional ones from the deck. The one who runs out of cards first wins. Don't forget to ask your child to name the letters on the cards!
Invite your child to build a chain of cards himself, following the rules of the game Dominoes. Let him select cards in such a way as to use as many letters and pictures as possible in one chain. The best option for completing this task is to place all the cards of the completed set in one chain.
Friends
Goal: memorize letters, learn to come up with words using letters, develop imagination, develop speech.
Age: from 5 years.
What you will need: pictures of different animals, letters from a cut alphabet or magnetic ones.
How to play?
Place pictures with animals on one table (stool, sofa), and letters on another table (stool, sofa). Take turns playing. First, take any picture yourself and figure out which letter the animal depicted on it would like to be friends with. For example: an ELEPHANT would like to be friends with the letter X because it has a trunk, and a CAT with the letter M because it catches mice. Find the corresponding letter, tell why the animal wants to be friends with this letter.
The next move is your child's. Give him the opportunity to choose a picture from those laid out on the table. If the child cannot come up with a letter for this picture, help him: ask a hint question. For example: a child chose a picture with a RABBIT, ask the child what a rabbit likes to eat (carrots - choose the letter M).
The game not only helps to remember letters, but also broadens the child’s horizons.
Other publications on the topic of this article:
Sections: Primary School
Class: 1
Goals:
- introduce children to the sound and object images of the letter “Z”, achieve a clear distinction between the image of the sound and the image of the letter;
- enrich the student’s vocabulary;
- develop logical thinking, the ability to compare, observe, draw conclusions;
- develop memory, attention, creative activity, fine motor skills;
- practice reading whole words; develop conceptual thinking when comparing objects (phenomena) by their location relative to each other in time: month (January - in January, etc., year and season (winter - winter, etc.);
- pay attention to relaxation during the lesson (outdoor games, walks, etc.).
Equipment:“A Primer” edited by A.F. Malyshevsky, albums, paints, gouache, colored pencils, felt-tip pens, natural materials, construction sets, plasticine; a set of pictures for the game “When does this happen?”, an image of Cinderella; various objects starting with the letter “Z”; bunny, snake - soft toys; cubes with letters; individual magnetic boards; cool cut cash register of letters (on magnets).
DURING THE CLASSES
I. Class organization.
U: Guys, today we continue our journey into the world of Knowledge. We will have many difficulties along the way, so we need to be very careful. Raise your hand those who are ready to cope with all difficulties. (Everyone raises their hands.)
Well done! Then let's go!
II. Introductory point.
U. What date is today?
T: What time of year ends?
D: Autumn is ending, 2 days left.
U: What autumn months do you know?
D: September, October, November.
W: Remember what interesting things happened to you in September.
D: We went to school in September.
U: And in October?
D: It was my birthday in October...
U: In November?
D: The first snow fell in November...
T: What time of year will it be after autumn?
D: After autumn comes winter.
T: Let’s play the game “When does this happen?”
(Children go to the carpet where the pictures are laid out.)
Listen to the riddle and say when this happens:
I bring the harvest
I am sowing the fields again,
I send birds to the south,
I strip the trees
But I don’t touch the pine trees and
Christmas tree. I…
T: Choose pictures that depict what happened in the fall.
(Children find, show and tell)
D: In the fall we harvest. In autumn the leaves turn yellow and fall off.
In autumn, birds gather in flocks and fly away to warmer climes.
I have a lot to do -
I'm a white blanket
I cover the whole earth,
I remove it from the ice of the river,
White fields, houses,
My name is …
(Children also find pictures of winter and discover what happens in winter.)
D: In winter it snows, everything around is white.
In winter we go ice skating, skiing and sledding.
In winter we sculpt a snow woman...
W: How has nature changed with the approach of winter?
(We approach the window.)
D: The trees are bare. There is snow all around. It's very cold today, bitter frost. You can't hear the birds singing.
The bullfinches have arrived...
U: Guys, let's sing a song about winter. To the soundtrack, the children sing the song “Zimushka, winter. ”
III. Sound image of the letter “Z”. Speaking tongue twisters.
Frosty winter morning
At dawn the birch trees ring.
U: Let's talk together and listen to which sound is pronounced more often.
D: Sound repeats (Z)
(Speak again, emphasizing the sound (Z))
On a winter morning from frost
Birch trees ring in the dawn.
U: In what words do we hear the sound (Z).
D: Zzzimnim - at the beginning of the word,
From frost - at the end of the word,
On zzare - at the beginning of a word,
They ring - at the beginning of the words,
Birch - at the end of the word.
U: Let’s say the tongue twister quietly, loudly. (children read)
U: Say the tongue twister the way a bear, bunny, or fox would say it.
IV. Subject image of the letter “Z”.
U: What letter represents the sound (Z)?
D: The letter “Z”.
U: What does the letter “Z” look like?
D: To the number 3.
U: Look at this letter:
She's just like the number 3 three. (Children show a picture of the number 3 on the board).
D: On the snake, which lay down and depicted the letter “Z”.
(They look at the snake - a soft toy).
U: - The letter “Z” looks like a snake,
Try to take a look at her!
- “Z” is not just a curl,
“Z” spring, pretzel, shavings.
V. Artistic and visual activities.
U: Guys, sit down at your tables, open your albums and imagine what the letter “Z” looks like and prepare a story about your image.
(children draw with paints, gouache, colored pencils, felt-tip pens - optional)
After listening to the stories, children lay out the letter “Z” from natural material, construct it from a construction set, mold it from plasticine, etc.
U: Look at how different the letters you got, but they are all recognizable. Now print the letter “Z” in your notebooks.
U: Olya, how many letters did you type?
Olya: I typed 15 letters.
U: How many letters does Dima have?
Dima: I typed 12 letters.
U: Guys, how many more letters did Olya type than Dima?
D: Olya typed 3 more letters.
U: Well done.
VI. The letter “Z” as the name of an object.
U: Today we have guests. Guess the riddle and find out.
She's beautiful and sweet
And her name comes from the word “ash”.
D: This is Cinderella. (They type this word CINDERELLA in the notebook).
W: Why do you think Cinderella came to visit us?
D: Her name starts with “Z”.
U: Which Cinderella? (Look at the image of Cinderella, remember the fairy tale.)
D: She is beautiful, hardworking, kind, handy.
U: Cinderella came to us not alone, but with her friends.
The forest dweller is nimble,
I tore off a cabbage leaf.
His eyelashes are trembling:
- Is there a fox somewhere?
D: This is a bunny.
(Children print BUNNY in notebooks and on a magnetic board.)
U: What sound do we hear at the beginning of a word?
D: Sound (Z).
U: What letter represents this sound?
D: The letter “Z”.
T: Find a bunny among our toys.
What is he like?
(Children look at him).
D: He is fluffy, long-eared, handsome, kind, cowardly, funny, oblique, soft, bright.
T: In what fairy tales did you read about the bunny?
D: In the fairy tales “Kolobok”, “Teremok”, “Zaykina’s Hut”...
U: Let’s show our guests the fairy tale “Zaikin’s Hut.” Let's remember this fairy tale. (Children tell) what animals are involved in this fairy tale?
D: Fox, hare, bear, wolf, rooster.
(The intonation with which the children will portray their hero is discussed: bear - rude voice; fox - cunning; hare - cowardly; rooster - vociferous)
The fairy tale is staged with the help of puppets - puppet theater. Children participate at will.
U: Well done, guys! Cinderella and the bunny really liked your fairy tale. Look, the bunny has some kind of note in his pocket. She's for you. It's a mystery. Let's read it. (Readed by a child who reads well)
The grain scattered by night.
We looked in the morning - there was nothing.
D: These are the stars. (Children print the word STAR in their notebook.)
U: What stars?
D: They are bright, shiny, small, distant, magical, ...
U: We also have stars in our room, we just need to look for them.
(Children search and examine after finding)
U: Let's say the word star again and listen to the first sound.
D: Zzzzzzzzdy. At the beginning of the word there is a sound (Z) and in the middle there is a sound (Z).
T: Count the stars.
D: One, two, three.
W: How many stars did you find?
D: We found three stars.
W: Compare them. Which star is the odd one out?
D: Two stars have four - 4 rays, and the third - 5.
U: How many more rays does the third star have?
D: One more beam.
U: Something is written on one star. Let's read it.
(The riddle is read by a child who reads well)
All my life I've been wearing a vest,
But without boots and without a cap.
D: This is a zebra. (The word ZEBRA is printed in the notebook)
T: Listen, what sound do we hear at the beginning of a word?
D: Zzzebra. Sound (Z).
U: What letter represents the sound (Z).
D: The letter “Z”.
U: What kind of zebra?
D: Zebra is striped, fast, beautiful...
U: Where can you see a zebra?
D: We can see a zebra at the zoo (Print ZOO in a notebook).
T: Say the word “zoo” again. What's the first sound?
D: Zzzopark. Sound (Z), it is denoted by the letter “Z”.
U: So we are going to the zoo together with Kiryushka.
Sit down at the tables and look at the pictures, make up a story based on them so that there are words with the letter “Z”.
Work in groups.
Group I – story “Tic Tac Toe” (about a zebra).
Group II - the story “We identified ourselves” (about a walrus). See Attachment
Group III – story “The Crocodile Got Offended” (about teeth).
Group IV - the story “Sobezyanikala” (about a monkey).
Children in their groups look at the pictures, prepare a story, and one student tells the story. The rest of the children listen and name the words in which they heard the sound (Z.)
U: Well done, guys! Your stories are very interesting. There are a lot of animals in the zoo. Now we will hold a relay race of animals.
ACTIVE GAME “RELAY OF ANIMALS”
Students are divided into 4 equal teams. The players take the names of the animals: “Bear”, “Hare”, “Fox”, “Wolf”, “Squirrel”, etc.
The teacher loudly calls any animal. Players run forward to the indicated place. Whoever comes running first gets a point.
The game is summed up.
VII. Work on the “Primer” (pp. 119-120)
U: We found a lot of words starting with the letter “Z”. But there are still words in the Primer. Open your textbooks and read the riddles.
(Children open their textbooks on pp. 119-120. Reading children read riddles, the rest guess.)
U: How many riddles are there on page 119?
D: three riddles.
U: How many riddles are there on page 120?
D: Two riddles.
U: Where there are more mysteries.
D: More on page 119, left page.
U: How much more?
D: One more mystery.
T: Look at the drawn strawberries.
How many berries are on the branch on the left?
D: There is one berry on the left.
T: How many berries are there on the right?
D: There are two berries on the right.
U: How many in total?
D: Just three berries.
W: How did you get three?
D: Two and one more, there will be three berries.
VIII. RESULT OF THE LESSON.
What letter did we meet?
What fairy tale characters have you met?
Well done boys! You worked hard and learned a lot of new things.
Illustrations


