The most interesting tasks of fallout 4. Main tasks
) and talk to Ellie Perkins. You can start this quest:
- Taking Marty Bullfinch's file from one of the files and listening to his holotape;
- Or Ellie will invite you to familiarize yourself with the affairs of the detective agency after you save Nick Valentine during the story quest “Valentine's Day”.
There is another case at the Valentine Detective Agency that may also interest you - the Earl Starling case (side quest "Disappearance Trick").
Find the gilded grasshopper
Nick Valentine's former partner, Marty Bullfinch, believes that a treasure map is hidden in the gilded grasshopper statue on the roof of Faneuil Hall. Perhaps you should take a look there.
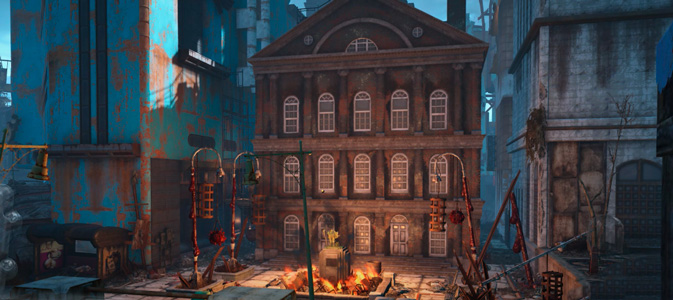
Faneuil Hall, a demolished commercial center, is located in Boston's Financial District near GoodNeighbor. This is a lair of super mutants who won’t let you through so easily, especially beware of kamikaze super mutants. Enter Faneuil Hall through one of the two front doors, although you can also use the doors on the west side of the building, this will shorten your path a little, but you will have to deal with a bunch of super mutants guarding them.
After entering from the front door, find the security terminal on the right (level - easy), with which you can activate the Protectrons. Then just follow them and watch them deal with your enemies.

In the shopping area behind some counters you can find useful items, such as medicine, food and hairpins. At the end of the trading floor on the right there is an elevator, you can use it and you will immediately find yourself on the third floor, which again will shorten your path to the roof. And near the right staircase there is a manager’s office with a terminal from which you can turn on the same protectrons, and this terminal does not require hacking.
Go to the second floor of Faneuil Hall. If you're short on studs or caps, check the restroom and then go to the large hall where meetings apparently used to take place. On the second floor you will have to win the right of passage from the super mutants, but I think this will not be too difficult. You will find ammo and weapons on and near the speaker stage. Then use the stairs to the right or left of the stage and go up to the third floor, passing through the balcony to the landing. In the rooms on the third floor you will find an elevator, which is where you can get from the first floor, as well as ammunition, weapons and some medicine.
Go up to the top floor, there is access to the roof of Faneuil Hall. Kill the enemies and collect trophies: in the chest and in the yellow box near the stairs you will find ammunition, weapons, medicine and caps, then go up to the roof.

Clue
As soon as you enter the room on the fourth floor, take a look at the coffee table next to the sofa. lies on it magazine "Live and Love" issue 7, with which the magazine perk will give you an increase in your companion's health by 10 units. You can familiarize yourself with all the magazine perks.

Once on the roof, you will immediately see what you came for. You will also find the corpse of Nick's former partner, Marty Bullfinch, obviously he couldn't cope alone.

You can get down from the roof of Faneuil Hall by jumping onto the scaffolding, but beware of the super mutants below. On the scaffolding you can replenish your supplies of medicine, ammunition and weapons - look carefully.
Read the note “Food for the grasshopper”
It seems Marty was right, there really was a strange note in the gilded grasshopper, but is it a treasure map? The mysterious note talks about the grave of Shem Drawn, in which, according to the note, everyone can find the meaning of life. It's time to find out what's really buried there.
Find Shem Drown's grave
Shem Drown's grave is in a small cemetery in the North End. Beware of the wild ghouls that roam among the graves. Dig up the grave marked with a marker. Inside you will find a unique weapon - the Sword of Shem Drawn, several ingots of copper, silver and gold, as well as a note “Do not be afraid” with some characteristics of the sword from the owner. Congratulations, you have found a treasure!

Reference: Shem Drawn's Sword
Damage: 35
Radiation Damage: 9
Speed: Average
Weight: 3
Price: 250
Peculiarity: Targets take damage from radiation.

Locations to explore:
- Diamond City
- Cambridge Police Station
- Regional office BKOANTOLO
- Malden Police Station
- Quincy Police Station
- Natick Police Department
- Nahant Sheriff's Department
- East Boston Police Station
- South Boston Police Department
- Police Station #8
- Coast Guard Pier
- Andrew Station
- Joe's Sandwich Shop (South Boston speakeasy)
Charisma
You can ask Nick Valentine why he cares so much, and you will learn that it involves a beautiful lady and the tragedy that befell her (conviction level: easy).
Find holographic recordings of Eddie Winter (10 pieces)
Nick knows where Eddie Winter's hideout is, but there is a lock on the door with a complex digital code. But there are 10 holotapes with incriminating evidence on Eddie’s accomplices, in each of which the scoundrel hid one number. Your task is to find the holotapes and create a digital code.
But Nick Valentine hasn't been idle all this time either, he has a dossier on Eddie Winter and a couple of records worth listening to: "Welcome Home!" and "Eddie Winter Holotape 1". That is, you already have at least one entry, nine more remain. You can check the police stations you have already visited. In each police station you need to find a terminal with evidence. Eddie Winter's file will tell you where to look for 1-2 holotapes, so you can find everything. After that, search the building for Winter's holotape itself.
Use the evidence terminal in Cambridge (optional)

Nick managed to get “Eddie Winter Holotape 1” from the Cambridge police station before the station was attacked by ghouls, that is, even before the events of the Brotherhood of Steel quest “Fire Support”. But he noticed a working evidence terminal there that could help him find the rest of the records.
If you came to the Cambridge police station after it was fortified and the arrival of help from the Brotherhood of Steel, which the soldiers were expecting after the events of the quest “Fire Support”, then take the time to run through the area again and collect supplies. In the green bedside chests you will find ammunition, medicine and weapons. Behind the counter opposite the entrance, you will find the key to the safe in the Cambridge police station (a safe has appeared here that was not there before). It is located in the corner office on the left as you walk from the entrance to the site. The safe can be hacked (lock level - difficult), opened with a key or using the intelligence terminal (level - medium), located in the same office - the choice is yours.
Clue
In the fortified Cambridge police station in the safe you can find magazine "Pistols and Bullets" Issue 6, allowing you to unlock or enhance a perk that causes firearms to deal 5% more critical damage. You can find a complete list of magazine perks.

But we came to check the evidence terminal. It is located in the evidence room (where there are a lot of shelves) in the left wing of the site. Hack it (level - easy) and find “Case 155-U: Winter, holographic logs”, it will indicate where 2 holotapes are contained. Your map will be updated, new markers will appear on it, pointing to locations where you can find this or that entry and another terminal that will give the following clues.

In the evidence room, if you have not been here before, you can find a lot of things confiscated from criminals. There is also a power armor service station in the police station garage.
Find Eddie Winter Holotape 00: BKOANTOLO Regional Office
Locations to explore:
- Cambridge Polymer Laboratories
The Cambridge Polymer laboratories are located in the Boston-Cambridge area, and the story quest from the Underground “Underground and Undercover” or simply wandering aimlessly around the Commonwealth can lead you here. When you enter Cambridge Polymer, you will be greeted by the robot Molly and asked to interview for an employee of the company. You can refuse.
Charisma
You can try to convince her that they can’t do without you (persuasive level - easy). This way you can avoid a bunch of unnecessary questions.
Molly will show you the way to the laboratory
Complete the research
The essence of the quest is that you will not be allowed to leave the Cambridge Polymer laboratories until the polymer coating research is completed, but you can try to find another exit from the laboratory, which is described below.
The quest will begin when Molly takes you to the recovery room and locks you inside, there is no turning back, so go forward. Go through the crack in the wall of the rehabilitation room and from now on beware of wild ghouls.
In the first room - the laboratory, you will find a research terminal with two compartments for reagents and one for a radioactive isotope. You need to find the correct reagents (which you can learn about from the nearby terminal) and isotope to complete the research and create a unique piece of power armor. Unidentified samples are scattered throughout the laboratory. Once you find the samples, you will need to scan them for the terminal to detect the reagent.

Let's go looking for samples. You will find the first unidentified sample 11317 right next to the research terminal.
Go up to the second floor first to ensure a more optimal path. In the corner on one of the desks you will find a working terminal (level - easy), with which you can deactivate the lock on the safe (level - difficult) standing next to it.
On the second floor there are two laboratories C3 and C1. Go first to laboratory C1. There, in a small room with a chemical laboratory, you will find some medicines on the shelves, and on one of the desks there is an unidentified sample 49.

Climb the rise in the ceiling and follow the ventilation pipe to the very end and jump down the hole. This will take you inside Laboratory C3. Of course, you can enter through the main door, but then you will have to hack the door control terminal (the level is difficult) and try not to fall into the traps behind the opened door. In laboratory C3 near the Bergman terminal you will find an unidentified sample 611. By the way, this particular terminal is necessary for the Underground quest “Underground and Undercover”.

Also on one of the pedestals you will find a holotape “Password for the storage of radioactive materials”, which is needed for the isotope storage terminal located on the first floor in laboratory C5.
Find another exit from the laboratory (optional)
There is another way to complete the quest and exit the Cambridge Polymer laboratories. In the Bergman terminal in laboratory C3, select the line “Complex security system”, and then “Emergency replacement - penetration into the complex”. This will reset the isolation mode, but now you will have to be on your guard, as this will activate the turrets and the Molly robot to guard the Cambridge Polymer. After killing Molly, take the key to the director's office from her.
Let's continue the search for samples and go down to the first floor. In the small room to the left of Laboratory C4 you will find an unidentified sample 3111, as well as some medical supplies and a radiation protective suit that you may need in the isotope storage facility.

Go to laboratory C4 and take the unidentified sample 413 standing near the window. Then go through the hole in the wall in this laboratory to the next one - C5. On the cabinet opposite the wall terminal is the last sample 65.


Hack the wall terminal (level - easy), which will open the door to the isotope storage. The terminal can also be accessed using the password found in the C3 laboratory (read above). The entrance to the vault is located next to laboratory C2. There, on a shelf on the far wall, the U-238 isotope needed for research is stored. But before you approach him, you will have to deal with the glowing ghoul. Be careful, as he has the power to revive ghouls you have already killed.

Return to the terminal to conduct research in laboratory C2. And scan the samples one by one, after inserting two into the reagent compartments.
- Unidentified Sample 11317 - Hydrochloric Acid;
- Unidentified Sample 3111 - Lithium Hydride;
- Unidentified Sample 413 - Gallium;
- Unidentified Sample 65 - Tungsten;
- Unidentified Sample 49 - Cobalt;
- Unidentified Sample 611 - Gold.
We load lithium hydride and gold into the reagent compartments, and U-238 into the isotope compartment, and then select the line “Run loaded production program” on the terminal. After production is completed, pick up the unique item from the pick-up window.
Reference: Piezo Nuclear Power Armor: Chest Model F
Damage Resistance: 302
Energy Damage Resistance: 232
Radiation resistance: 300
Weight: 25
Price: 735
Peculiarity: Radiation increases the recovery rate of action points.

Return to Molly and report on completion of the research. She will release you and ask you to follow her to the director's office.

Follow Molly and talk to the director
Exit the laboratory premises and go up to the second floor, passing through the kitchen and grab Yader-Cola in the refrigerator. Then the following will happen, either Molly will open the door to the director's office and the ghoul director will kill her, or you will kill the ghoul and Molly will attack you. Either way, finish them off. If you have already killed Molly earlier, then you probably took the key to the director’s office from her, if not, then go back for it, since the level of lockpicking is very difficult. Inside, on one of the display cases, you will find a nuclear unit for power armor.
Clue
Another number awaits you on the director's desk. "Massachusetts Surgical Journal" issue 6. It will unlock a new perk or enhance an existing one, and you will deal 2% more damage to limbs. The entire list of magazine perks and their actions can be viewed.

In the office, also located on the second floor, there is a box of ammunition on one of the desks (lock level is light).
The quest is completed, and you have a new unique item.
- Collect technical documentation for Proctor Quinlan
You can receive this quest from Proctor Quinlan aboard the Brotherhood of Steel airship by talking to him during the Brotherhood of Steel quest "Business Trip" and agreeing to help him.
It will appear in your Pip-Boy in the “Info” → “Miscellaneous” tab. Now, during your adventure through the Wasteland and completing any task, you may encounter Technical Documentation in any desk, file cabinet or safe. Collect them, and then upon returning to the Prydwen, stop by Proctor Quinlan and provide him with the documents. You will receive a reward from him.

This quest is constantly repeated.
Reward: Lids (25 per copy)
Locations to explore:
- Institute
- Virgil's laboratory in Rocky Cave
Virgil is an escaped Institute scientist whom you seek out during the story quest "The Glowing Sea" to find out how to infiltrate the Institute. He asks you to help him find the serum at the Institute in exchange for his knowledge. This is a quest from the Miscellaneous section, and at first you won’t even see it. It’s worth mentioning right away that he will help you without the serum, and even if you decide to help him, you will receive almost nothing for your services.
Find the serum for Virgil
When you infiltrate the Institute as part of the story quest "Molecular Level", you will have the opportunity to explore it. Dr. Virgil's former laboratory is located in a restricted section of the Biosciences Department. You can visit it in search of the serum purposefully or capture it along the way while searching for evidence for Dr. Lee during the Brotherhood of Steel quest “From Within”.
There are two ways to get to the laboratory:
- You can hack the terminal (the level is very difficult), which will turn off the laser grid on the passage, and you will find yourself in the FEV laboratory. The terminal is located to the right of the synth gorilla enclosure.
- Or you can take a more difficult route, especially if your terminal hacking level leaves much to be desired, and hack the door to the FEV laboratory (lock level is easy). Go deep into the biosciences department through the rooms with plant plantations, and then along the corridor to the locked door to the laboratory.
The downside is that the second method assumes a longer path to Dr. Virgil’s immediate workplace, while the first method assumes that you will get straight to where you need to go.
Still, we will take the second route through breaking the door, since, most likely, this is what many will have to do. So, we break open the door and immediately come across a laser trap. This doesn't seem to bode well.
Hack the door to a small room with broken windows (level - easy) if you are low on ammunition and medicine. Then follow further along the corridors of the laboratory, but be aware that machine gun turrets await you around almost every turn. However, a more dangerous enemy is ahead, namely behind the locked door (the lock level is medium). You can also open this door using the terminal (level - easy) located next to it; by the way, the same terminal disables the turrets. Opening the door you will find yourself in a storage room with an assault gun walking around.

- The most important thing in fighting an assault gun is not to let it shoot an energy beam from your head, as it will kill you almost immediately. Or try to evade it.
- Don't paint yourself into a corner, as the Assaultron will constantly attack you. Move and try to keep him at a distance so that you have room to maneuver.
- Choose a more powerful weapon.
In this warehouse you will find: caps scattered on the table, a first aid kit, food and modifications on the shelves. We go further and find ourselves in a corridor with many small rooms, probably where experimental super mutants were kept, the virus of which was studied by the FEV laboratory. In the locker room, the first door on the right (lock level is easy), you will find medicines. There is nothing in the other cells. Better beware of the turrets waiting for you ahead and the laser traps under your feet.
Then your path will be blocked by a door that requires you to open it using a terminal. It is located nearby (level - easy), and this terminal can also disable turrets.

This door leads to the research center where Dr. Virgil worked directly. Here you need to find the experimental serum that he is eager to obtain. It lies on one of the laboratory tables.

Having finished examining the FEV Laboratory, exit through the door leading to the biosciences department and, having turned off the laser network using a terminal that does not require hacking from this side, return to Dr. Virgil in the Rocky Cave.
Take the serum to Virgil
Give the experimental serum to Virgil. He will immediately inject it into himself and tell him to come see him later: in a couple of days, or weeks, or even a month... Don’t waste time and don’t try to wait for the result in standby mode. It’s better to go further to explore the Wasteland of Fallout 4 and wait for the appearance of the new task “Talk to Virgil” from the “Miscellaneous” section - it’s time to check whether the serum worked or not.
Talk to Virgil
In the Rocky Cave you will find an absolutely normal person, and not a green super mutant brute.


Location:
- General Atomics Galleria
Exercise:
- Report to the system Director of the General Atomics Galleria shopping center
Perhaps you were brought to this location when you were completing the Brotherhood of Steel quest “Prime Acquired” or simply wandering around the Commonwealth - it doesn’t matter. However, the Greeter, the robot at the entrance to the General Atomics Galleria shopping center, assumes that you are the new manager, 210 years late for work. You can enter the central statue of the giant Mr. Helper and report to the "Director" system as a manager. Thus, as a new owner, you can take whatever you want from all the establishments of the center. Otherwise, you can only steal, and if you get caught, you'll have to fight angry robots who want their property back.
Use the elevator at the base of the giant robot to go up and down. Hack the terminal if you wish (the level is very difficult).
- If you've been to the General Atomics plant in South Boston and carefully toured the director's office on the second floor, then you probably have a General Atomics ID. Present it to the robot Director, and everything will be fine. For more information on where to find the ID, see the walkthrough of the quest “New Threat”.
- If you don’t have an ID, you can try to fool the robot using charisma (persuasive level - medium to difficult).
- If you kill the Director, you can use his terminal (the level is very difficult) to choose from several options: disable or destroy the robots serving the shopping center, or start the reopening of the shopping center. Can't hack your terminal? Then use the service password for the "Galleria", which you could find in the office of the manager of the "Bowling alley" - the bowling center in its terminal (level - medium). For more information on where to find the service password, see the walkthrough of the quest “Prime Acquired”.
Reward:
Everything that you can find in the General Atomics Galleria shopping center and that seems useful to you.
Who issues: Proctor Neria
Location:
- "Prydwen"
Exercise:
- Find normal blood samples for scriptor Neria
This quest can be obtained from scriptor Neria aboard the Prydwen. It can be started after completing the Brotherhood of Steel quest "Business Trip" by agreeing to help her. It will appear in your Pip-Boy in the “Info” → “Miscellaneous” tab.
Scriptor Neria is researching Wasteland creatures created by radiation in order to subsequently find a cure or weapon against them, and for this she needs blood samples. Finding its location on the Prydwen is not difficult: go up one of the stairs next to the dining room to a higher level and go in the opposite direction until you see the corpses of various creatures on medical beds.

Scriptor Neria has modified your Pip-Boy to search for "Normal Blood Samples" from wasteland creatures you kill. In order to detect such samples, check their corpses for the presence of the “Normal Blood Sample” item and remove it.

Then, at a convenient opportunity, return to the scriptor Neria and give all the normal blood samples that you found in the vast wasteland. The quest is constantly repeated, and also a fairly easy way to earn extra caps. Yes, yes, you are not risking your skin for free.
Reward: Lids (25 per sample)
Location:
- General Atomics plant
Exercise:
- Pass a quality control test consisting of three stages.
The quest “A New Dawn”, associated with the first addition to Fallout 4 Automatron, could lead you to the General Atomic plant. Since you're here, why not complete the mini-quest from the Miscellaneous section.
There is a quality control department on the ground floor of the General Atomics plant. You can open the door using the terminal of the QC Department.

They mistook you for a Miss Nanny model robot and want to check the quality of your settings:
Stage I: Behavior adjustment skill
Go to the first test chamber. A child broke a priceless vase: you need to punish him - turn off the playing radio.
Stage II: Intonation Recognition Program
Go to the second chamber. The baby is crying: you need to understand why and satisfy the need - take the bottle with the pacifier on the dresser, holding down the [E] key, and lower it into the crib. The child was hungry.
Stage III: Threat Recognition Matrix
Go to the last test chamber, the premises of which you need to secure by moving any objects that pose a potential threat to the child. Take the wrench under the ottoman, the Abraxo cleaner on the second shelf of the lamp stand, and the cleaver in the refrigerator.
Congratulations, you are a perfect fit for the Miss Nanny model robot.
Reward:
Contents of the safe in the corridor, including a couple of nuclear blocks for power armor

Who issues: Aster
Location:
- Acadia
Exercise:
- Find the Aster flower
While walking around Acadia, for example, during the course, you may come across a laboratory/medical station located on the second level. It is run by Aster, a physician and scientist. She admires the island and collects samples, information about the course of evolution for future generations. Offer her your help in research and she will have a task for you. This tiny quest is repetitive and won't even show up in the Miscellaneous quests section. However, it does not require any special effort and can be performed while exploring the island.
There is one flower growing on the island - from the genus Aster - which thrives in these conditions. Recently, Aster began to explore their chemical properties. She wants to know how this species has changed over several centuries, or maybe it’s all in the name?! But if you bring her additional samples, it will speed up her work significantly.
These flowers can be found all over the island. You may have noticed the Aster flower even on the way to Acadia while climbing the mountain path during the quest A Walk in the Park.

Collect flowers, and at any opportunity, return to Acadia to Aster and give them to her. For this she is ready to thank you with a small amount of caps.
Reward: Caps (8 per flower)
Exercise:
- Find a container with Marine Corps combat armor
One of DiMA's old memories that we retrieved from the Core in the quest "Best Not Remembered" mentioned that the local marines had modern models of combat armor. On the day the bombs fell, several sets of such armor were being transported to the submarine base. If the packages remain sealed, the armor should be in perfect condition. The coordinates of the armored cargo were also included in the memory. The current quest is considered a quest from the “Miscellaneous” section.
In total, you need to find three containers scattered at different ends of the island. However, all containers are under water, so you should be prepared.
Help: What helps you breathe underwater in Fallout 4?
- Power armor is suitable for short stays under water (2-3 minutes). It has a fairly decent supply of oxygen, but not an endless one. When you start to choke, you will only be saved by constant restoration of health with stimulants and food. It happens like this: you restore your health - the arrow creeps toward plus, and then immediately quickly drops to minus. The disadvantage of power armor underwater is that you can only move sooooo slowly.
- The Aqua Boy/Aqua Girl perk allows you to breathe underwater and not take radiation damage while swimming. To do this, you need the S.P.E.C.I.A.L attribute. Endurance was level 5. You can see the rest of the perks.
- Swampweed cake is a dish that allows you to breathe underwater for 30 minutes.
- The unique item “Rescue Suit,” which you may have already received in the “Wind of Change” quest from the Far Harbor add-on, allows you to breathe underwater and provides protection from radiation.
Now let's move on to the location of the armor.


One container is located near Rayburn Point and the DiMA Cache, on the western edge of the island. The sealed armor box is in a large red container, and inside:
- Marine Armor Assault Helmet;
- Marine Corps Tactical Helmet;
- Lead Marine Assault Armor;
- Marine wetsuit.
The armor containers are the same - a green military chest with a star on the lid.

The second container is located near the Children of the Atom Sanctuary and Haddock Cove, at the southwestern edge of the map. You will find a sealed box with armor on a sunken ship in the cargo compartment, and inside there will be:
- Marine assault armor for left leg;
- Marine assault armor for the right leg.
On the same ship on the second level you will find a wooden box with medicines and 2 boxes with explosives.
The last container remained, which sank near the Azalea and Grand Harbor Hotel locations, at the southeastern edge of the map. In him:
- Marine assault armor for the left hand;
- Marine assault armor for the right hand.
At the Mayor of Boston's hideoutHelp: Marine Assault Armor
Marine assault armor is the best armor in Fallout 4, not counting power armor, of course. You can only find it on the island in the Far Harbor add-on. The only exceptions are unique items of this armor, the performance of which is slightly higher - reconnaissance armor of the Marine Corps. You can purchase them from merchants of different factions (Koga from Acadia, sister May and Kane from the Children of the Atom, for example)
Talk to Sierra Petrovita
Give Sierra a bottle of Quartz Yader-Cola (optional) Sierra Petrovita is an ardent fan of Yader-Cola and everything connected with it. You can meet her at the entrance to the territory of Mount Fizztop in Yader Town, USA. She wears funny glasses and is in search of something important. You will have a task from the “Miscellaneous” section asking you to talk with her. Subsequently, you can receive from her the quest “The Cap in the Haystack”.
Talk to Sierra Petrovita
Meet her. She is simply obsessed with Yader-Kola and has always dreamed of visiting the Yader-Mir park. She even has her own Yader-Cola museum. She collects everything related to Yader-Cola - a true fan.
Charisma
Try to pass off a lie as the truth, as if you had heard about the Sierra Museum (persuasive level - easy). If it works, you will receive a bottle of Yader-Cola from her.
Now she is looking for something, so you can offer her your help. However, Sierra Petrovita is not one to immediately trust a stranger, so you will have to earn her trust. You have several options for developing a dialogue with her. Which option you choose determines how quickly you will receive the quest from her:
- Quick quest pickup: Use persuasion.
Charisma
Tell Sierra Pertrovita that she can trust you (medium level of persuasion). If the persuasion works, she will tell you what she is looking for, and you will immediately receive the quest “The Cap in the Haystack.”
- Receiving a quest for an additional action: Tell Sierra Petrovita you're as big a Yader-Cola fan as she is. She will be delighted and will want to give you a tour of Yader Town. Agree to take a tour. Your quest from Sierra Petrovita “The Cap in the Haystack” is activated, but with an additional task related to the excursion.
- Slow quest acquisition: Ask Sierra what you could do to convince her to trust you. There is one type of Yader-Cola that she hasn’t drunk for a long time - Quartz Yader-Cola. She glows. If you bring her a bottle of this, she will share her secret.
Help: Quartz Yader-Cola
Action Points: 240
Radiation: 11
Weight: 1
Price: 40
Give Sierra a bottle of Quartz Yader-Cola
You can find quartz Yader-Cola in several places:
- During the quest “An Ambitious Plan”, examining Mount Fizztop, the abode of the Adepts. You will come across Quartz Yader-Cola if you go in a circle to the right until you reach the mattresses lying on the floor. The treasured bottle will stand against the wall.
- Also during the passage of the quest “An Ambitious Plan”, but already inspecting the Operators’ base. Quartz Yader-Cola stands on a shelf in the utility room to the left of the stage.
- There is a lot of quartz Yader-Cola in the area of the Galaxy Park, where you will go during the quest “Grand Tour”, and will explore while completing the quest “Star Dispatcher”.
If you know where you can still find Quartz Yader-Cola in the Yader-Mir park, then please write in the comments for other players.
After you have given the Quartz Nuka-Cola to Sierra, you need to again offer Sierra help in her search, tell her that you are a fan like her, or use persuasion (read about it above).
As a result, you will receive from her the quest “The Cap in the Haystack”, in which you will search for hidden images of Mr. Cap throughout the Yader-Mir park.


Location in the Commonwealth. Inside you can find useful bonuses and equipment. Once in the bunker, you will find a sea of corpses. The upper levels are protected by turrets, but below there are no enemies at all. Search the rooms on the lower level to find valuables.
On one of the tables there is a holo-recording of the “Guard's Message”, which tells the history of this place. In the other room is the magazine “My Brain and Me”, which increases HP recovery by one per minute.

Nearby you can also find the key to the mayor's toilet, and his remains in the bathroom. On the toilet there is a holo-recording of “The Mayor’s Farewell”, from which it becomes clear that the official was a fierce corrupt official. Furious taxpayers laid siege to his house, so he was forced to commit suicide.
Going even lower, into the room with basketball hoops, you will meet synthetics. Aggressive synths will attack you until you exit. In the same gym there is a door to the generator room, where there is a nuclear battery and a holotape “Where are you?”
Finally, the gym also has a tunnel leading to the deathclaw's lair. In the nest itself you can take the Fat Man cannon.
At shelter 75
One of the few available Wasteland Shelters with a unique quest and useful items. The quest is activated as soon as you enter the building.
Go to Taffington's boatman's house. Above it you will find the town of Malden, in the north of which there is a school. She is the Shelter.

Find the grating and go down to the basement. The door to the Vault will be open, since the marauders and the Brotherhood have already managed to get here. It is quite possible that you will meet both of them along the way.

All you have to do is explore the premises and listen to holotapes to learn about the history of this place. Soon you will come across closed doors leading to the laboratory. You need to find an access code, a card with which one of the shooters will certainly have.
Once in the laboratory, look through the terminals and move on until you see a mini-copy of the city.

In one of its buildings you will find a code for access to the administrative rooms and a Science doll. Soon you will find the Overseer's office with a terminal.
It turns out that they once experimented on children here, trying to develop a more perfect human genome. This gave rise to discontent among some residents, and then led to a fatal riot.
At refuge 81
The only Vault still working. Located south of Sanctuary Hills, a little further from the river. You can find out more about the location from a traveling merchant dressed in a Vault 81 uniform.

Before you go, make sure you have a high charisma skill or three extra nuclear batteries in your bosom, otherwise they won’t let you through. Having reached the location, go down to the entrance and press the button.
Inside, talk to the guards and either talk them down or give them nuclear blocks to enter peacefully. After that, find the Overseer and start a conversation.

Vault 81 is a fairly large location and has additional quests: “Nook”, “Addiction”, “Kitty-kitty-kitty” and “Stories”.
Zakutok

The quest is issued in Vault 81 after you complete the quests "Tales" and "Kitty-Kitty-Kitty". To get started, go to the medical block and talk to the female doctor. She wants to cure the sick boy Austin, which the head physician Forsyth opposes.
When the argument is over, talk to the woman. Then worker Bobby will tell you about the Vault's secret room with a terminal. It talks about strange experiments on mole rats, from the bite of which our boy Austin fell ill. After this, you will be sent to find an antidote.
Before performing, put on power armor, as mole rats can infect you too (-10HP is not good for anyone). Follow Bobby into the room with the reactor. Inside, you will go through the secret passage alone and begin to fight the mole rats.

Soon you will find a terminal with a very complex lock, which can be opened either manually or with the key that is on the table in the next room.
Once indoors, you will see a robot behind glass in another room. The white medical unit strongly resembles Codsworth, but, however, does not have the same politeness. In a conversation with you, Curie will insist that you are a Vault-Tec security guard. If you agree, she will open the door. Then Curie will tell you that 83 years ago she managed to create an antidote against the infection of mole rats. Alas, there is only one flask, and it will not be able to create more.
Before returning to the Vault, explore the room and pick up the Medicine doll. By the way, Curie can become your partner.
Addiction

The quest becomes available only after completing the task “The Nook”. Presented by the girl Tina De Luca, who is in the generator room of Vault 81.
You must find her brother Bobby De Luca, who is somewhere in the living quarters, and convince him to begin treatment for drug addiction.
"Walkthrough of Fallout 4"
The release of Bethesda's Fallout 4 marked the end of countless meetings and interactions with friends, as the vast, open-ended, gorgeous role-playing adventure kept many people captivated for hundreds of hours. It's the first game from Bethesda Game Studios since the release of Skyrim in 2011, and the follow-up to the much-loved Fallout 3 from 2008. Fallout 4 offers a huge post-apocalyptic city of Boston where you will create your own story. The future ruined Boston is imbued with stories of America's grander past, and somewhere here Fallout 4 shifts the focus to creating your own settlements and communities. There's so much to take in that you'll likely need support and help to get through the Wasteland and the various quest lines to the end of the story. This is where our complete guide will no doubt come in handy. This is a complete walkthrough of Fallout 4, including a detailed description of the game's storyline and main quests. The guide is divided into several parts and is published as it is written, we will update it over the coming weeks until we complete the post-apocalyptic story (playing on the highest difficulty level - “Survival”).
Fallout 4 Walkthrough Guide
Our quick guide will quickly get you through the game's prologue.
2. Time is running out
Here you will learn how to easily complete the Time Is Running Out quest, from talking with your old friend Codsworth to arriving in Concord.
3. Call of Freedom
How to complete the quest "Call of Freedom": from searching for settlers to clearing Concord in the new power armor and returning to Sanctuary Hills.
4. First step
How to complete the quest "The First Step": from finding Teynaps Bluff to clearing out enemies in the Corvega car assembly shop. Talk to the settlers in Tenpines Bluff.
5. Pearl of the Commonwealth
How to complete the Jewel of the Commonwealth quest: from arriving in Diamond City to learning about Nick Valentine.
6. Valentine's Day
How to complete the Valentine's Day quest: from the search for Nick Valentine to the unexpected discovery of Vault 114.
7. Revelation
How to complete the Revelation quest: the first clue in finding Sean, getting the key and searching Kellogg's home.
8. Reunion
How to complete the Reunion quest, from killing the dwarf yao-gui to tracking down Kellog with Dogmeat.
9. Dangerous thoughts
Description of the quest “Dangerous Thoughts”: from meeting with Dr. Amari to exploring the dark past in Kellogg’s memory.
10. Glowing Sea
We go through the story quest “The Glowing Sea”: from finding a protective suit to tracking down Virgil in the Crater of the Atom.
11. Hunter/prey
Everything you need to know to complete the Hunter/Hunted quest, including tips for fighting the Hunter Synth Z2-47.
12. Molecular level
How to complete the quest “Molecular Level”, which we started in the previous part of our walkthrough.
13. Undercover work
How to complete the quest “Agent Work”: from talking with the Deacon to building a teleport to the Institute.
14. Closed institution
How to complete the quest “Closed Institution” - this is the last quest from the main story.
15. All four possible endings of Fallout 4
Description of game endings for the Institute, Brotherhood of Steel, Minutemen and Underground.
War… War never changes.
Yours "A new game" begins with a black-and-white video showing a world powered by fusion energy. But, as often happens, not everything went well...
After the end of the video, the game gives you the opportunity to choose the gender of your character and customize your appearance. After playing with the editor, go look around the house. To the left of the bathroom will be your child's nursery - Shauna. Here you can play with it. On the right are the living room and kitchen.
In the kitchen you will be greeted by a friendly robot butler named - Codsworth. After a while you will hear the doorbell, Codsworth is busy, so you will have to open the door. An employee of the Vault-Tec company will appear on the threshold. According to him, you received a pass to "Vault 111"(choose answer options in the dialogue at your own discretion, they will not change anything significantly).
After accepting the agent's offer, you will be asked to fill out a registration form. This time, you will be asked to choose a name for your character, as well as distribute points in .

After filling out the form, go to the nursery and calm the child down. After talking with your significant other, Codsword will announce a breaking news broadcast on TV. After the broadcast is interrupted, run out the front door and run along the street. There will be military men on the street who will show the way to the shelter.

Introduce yourself to the soldier at the entrance fence, he will let you through. Step onto the lifting platform and it will lower you into the shelter just before the explosion on the horizon. When the lift stops, go with the survivors to the registration point, take the overalls there. Next, follow the doctor along the corridor. He will lead you to the cryocapsule. Enter it.
The prologue is over.
Time is running out
You are frozen in a cryocapsule, after some time you wake up and see how your child is taken away and your husband/wife is killed. After this dramatic scene, you are frozen again.
Leave the shelter
You will wake up from an alarm in the shelter, now your task is to get out of it. To do this, leave the room with the capsules and go to the end of the corridor. The exit door will be blocked and you will have to go around. Focus on the mini-radar located at the bottom of the screen. Follow the indicated point, you will find yourself in a room with generators ( Attention: walking close to them is life-threatening!). Along the way, deal with the radioactive cockroaches and open the door.

In the next room take gun And stimulants(they restore 30% health), also take the ammo in the box. The next door is also closed, to open it use the terminal on the table, find the command in it to open the door. When you enter the corridor, the game will prompt you to deal with the cockroaches using
After passing the corridor, you will find yourself in the room where you were registered during the disaster. Near the ski lift you will find "Pip Boy", use it to activate the panel. Go to the elevator and rise to the surface.
Come home
Already on the surface, a marker will appear in your mini-radar. Head to him, he will lead you to your house, where Codsworth will be waiting for you.

From a conversation with him you will find out what happened to the rest of the people and how many years have passed. After this, explore the area with Codsworth. After entering a couple of houses, you will have to fight flying cockroaches. Be careful, every blow they hit will irradiate you. It will help to get rid of this antiradin. After searching the houses, Codsworth will assume that your son can be found in Concorde.
Explore Concorde
Head across the bridge to the east. You will be taken to the location "Red Rocket", a friendly dog will meet you there. This is a fairly useful companion that you can give orders to. But if you think the dog will be in the way, you can send it to " Sanctuary".
After defeating the mole rats, move towards the marker. Concorde will be under attack by riders, having defeated several at the entrance to the city, go to the museum, where there are still peaceful people.
Call of freedom
After entering the building, deal with the enemies on the second floor, turn left and climb the stairs, making your way to the civilians. Talk to Preston Garvey, he will ask you to deal with the raiders on the streets using power armor. To activate it, find the generator, it is located on the first floor where the floor collapsed. After inserting the generator into the suit, tear off the minigun and go down to the street. With this suit, killing all the raiders will not be difficult.

But the raiders will only be a warm-up for the monster called the Death Claw. During the battle, do not let him close to you and shoot him from a safe distance. After defeating all enemies, return to Preston Garvey. In a conversation with him, you will learn that the search for Sean should begin with Diamond City. To complete the task, talk to Preston at Sanctuary.
Pearl of the Commonwealth
Get to Diamond City
The path to a major city will pass through many dangers, such as ghouls in Lexington And Corvega workshop, where the riders settled. So, before going further in the story, take the time to level up your character, there is plenty of time for this.

Before the gate to the city you will meet a local journalist - Piper. With its help you will pass through the gates into the city. The mayor of the city will come out to you outside the gates. If you have enough charisma, you can find out the necessary information about Sean from him. If you forgot about this skill when leveling up your hero, then when you enter the city, talk to the locals to find out where to start your search.
Get to Valentine's Agency

You have been advised to contact a local detective. Follow the marker on the mini-radar and enter the agency.
The detective himself will not be in place. According to his secretary, he disappeared. Your task is to find him.
Valentine's day
The story for the Institute can only begin if you agree to join them.